|
||||||||||||||||||||||||||||||||||||||||||
|
|
|
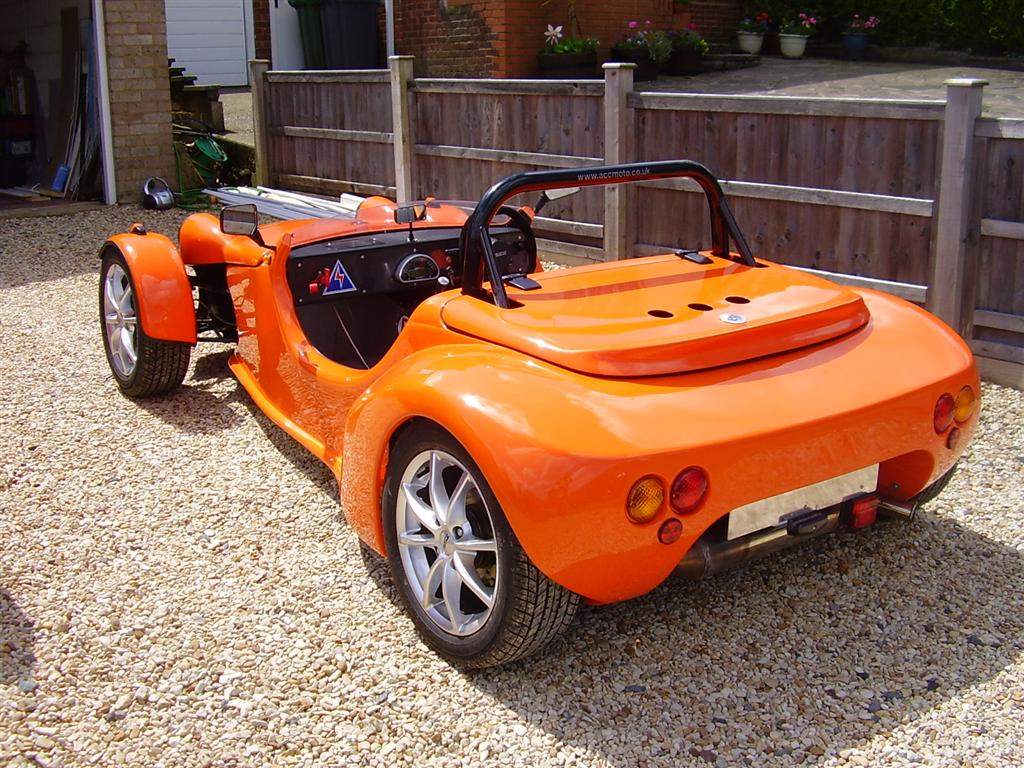
Fitting bonnet hinges - December 2009 As you may have read in the main build diary, my original bonnet mounting solution was proved insecure on the way to my second SVA test, as it dramatically parted company on the A46... I was therefore forced into a somewhat hurried solution in order to get the car re-tested as quickly as possible, and went for the belt and braces approach of bonnet pins in conjunction with the original lock. This has proved to be a secure solution, but one that brings it's own problems, the main ones being that the bonnet is a pain to remove, and a pain to store safely once removed, and that the bonnet is a source of rattles! Over the 5 years that my Mojo has been on the road, more Mojos have been completed, with a few alternative hinges used. I particularly liked the look of the ones used by Tom Clarke on his orange SE:
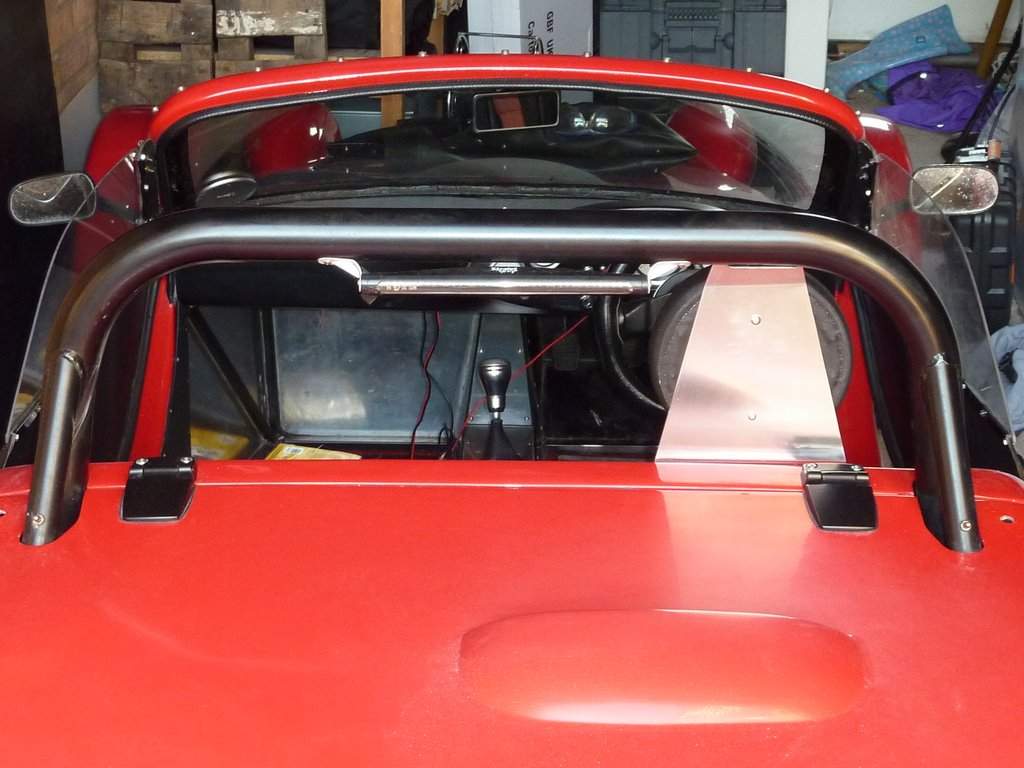
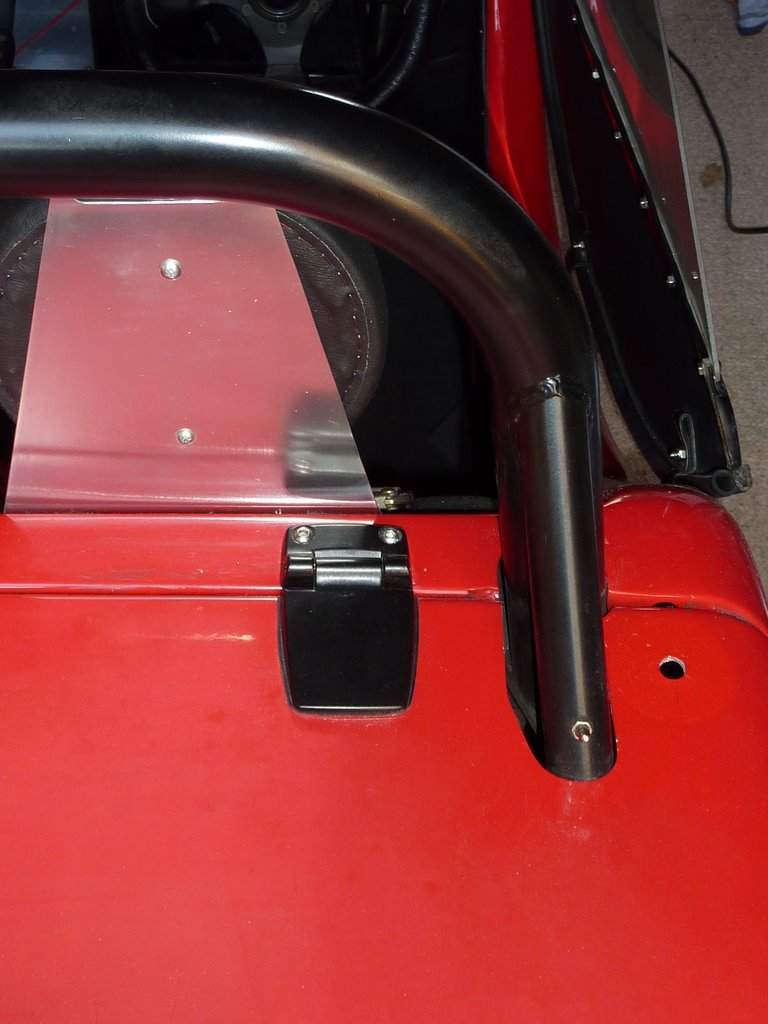
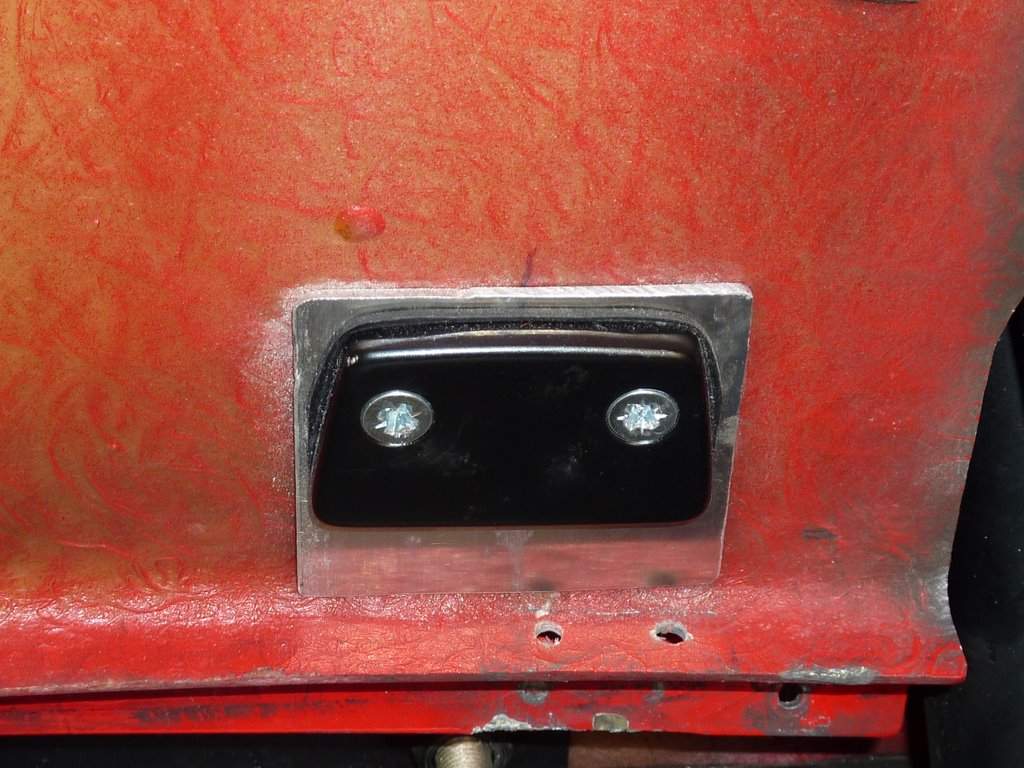
I spoke to Tom to find out where they were from, and in a strange coincidence it turned out that he had a spare pair at home, and offered them to me for free! Tom handed the hinges over when we met again at the JPSC Llandow trackday in September 2009 - thanks Tom! The first job was to confirm the state of the paintwork under the large protective plates that surround the bonnet pins. My hope was that the paint would be ok and I'd just be left with an 18mm hole in the fibreglass, rather than a 50mm area with no paint! The former would be rather easier to 'disguise' than the latter! I had an inkling that I had fixed the plates with silicone sealant, so I hoped that the plates would come off without damaging the paint, and so it proved to be, thankfully! Once the plates were lifted, the silicone residue was slowly removed, and then the area given a polish. There is a distinct change in the colour of the paint, as the plates have clearly prevented the paintwork from fading (the engine cover in particular has suffered with fading over the years), but I don't think it will stand out too much (and I guess some more fading will soften the divide), and plan to fit some kind of badge or sticker to hide the holes which will hopefully distract the eye a little from the surrounding change in shade. Next job was to remove the alignment plates (just strips of angled aluminium) from the engine cover and the rear edge of the tub aperture (these helped to stop the rattles a little, and help the bonnet aligned with the tub). The old bonnet pins and associated brackets were then removed. Time to decide on the location of the new hinges! They ended up directly behind the outer seatbelt mounts, just because that looked about right. Conveniently, the part of the hinge fixed to the main tub will double up as a guide for the rear screen; this now slides in from the side and gets wedged between the headrest brackets and the fixed part of the hinge. The hinge position was marked up on the engine cover first, and the holes marked and drilled, making sure that the hinge axes were pointing towards each other. A small aluminium spreader plate was made for each hinge, to spread the clamping load more evenly. The bonnet & hinge assembly was then offered into place and the holes marked & drilled on the main tub. Finally 4 nuts and bolts were used to secure into position. I was then able to check how much the rear stay slots would need to be opened up to allow the cover to hinge open to a suitable angle. This was a bit of an iterative process, with the dremel being used to pare back the material a little at a time, before trial fitting and inevitably finding out that a little more material needed removing! I settled on the cover being able to open most of the way (probably 80 - 85 degrees) and will shortly engineer some kind of stay that will hopefully prevent the bonnet being opened beyond this. Here are the pics:
In the middle photo you can just make out the colour variation around the original bonnet pin hole. I plan to disguise the hole itself with a badge or sticker of some sort, possibly a couple of these MG items, which I think are fairly in keeping with Sylva tradition:
|
||||||||||||||||||||||||||||||||||||||||
|
|
||||||||||||||||||||||||||||||||||||||||||