|
||||||||||||||||||||||||||||||||||||||||||
|
|
|
High level brake light - August 2005 Having now passed the 5000 mile mark in the
Mojo, I'm increasingly aware that quite a few drivers of other cars do
tend to tailgate in traffic (I guess because the drivers feels they can
see 'over' you in a 'little kit car'). I'm also aware that the hydraulic
brake light switch isn't quite as sensitive as it could be. In an attempt
to reduce the chances of being rear-ended, I decided on two relatively
easy upgrades:
1- Fit a high level brake light. Jon, who has been unfortunate enough
to suffer 2 recent rear end shunts in his Caterham, got me thinking about
this. His most recent repair has included having a high level brake light
fitted. Having also seen various other kits with these fitted, I decided
to do likewise.
2- Fit a microswitch to detect movement of the brake pedal. This is the
method used on pretty much every production car. So, I bought a
microswitch for £1.19 from Maplin, with a plan to run it in parallel with
the existing hydraulic switch to give an element of fail-safe.
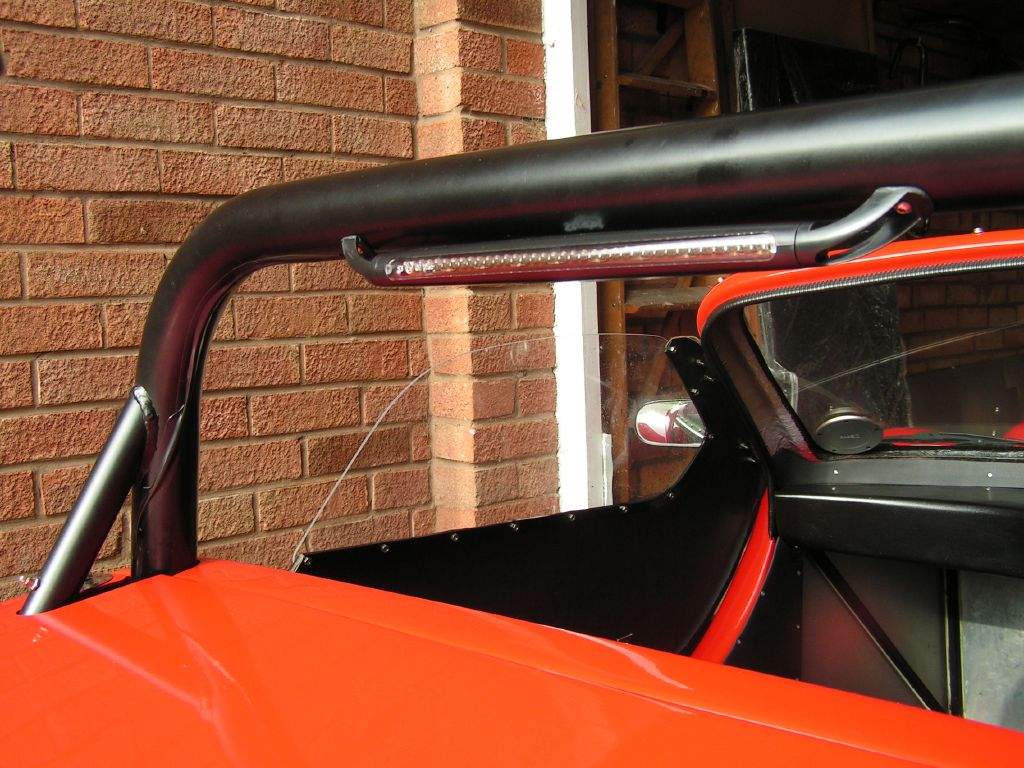
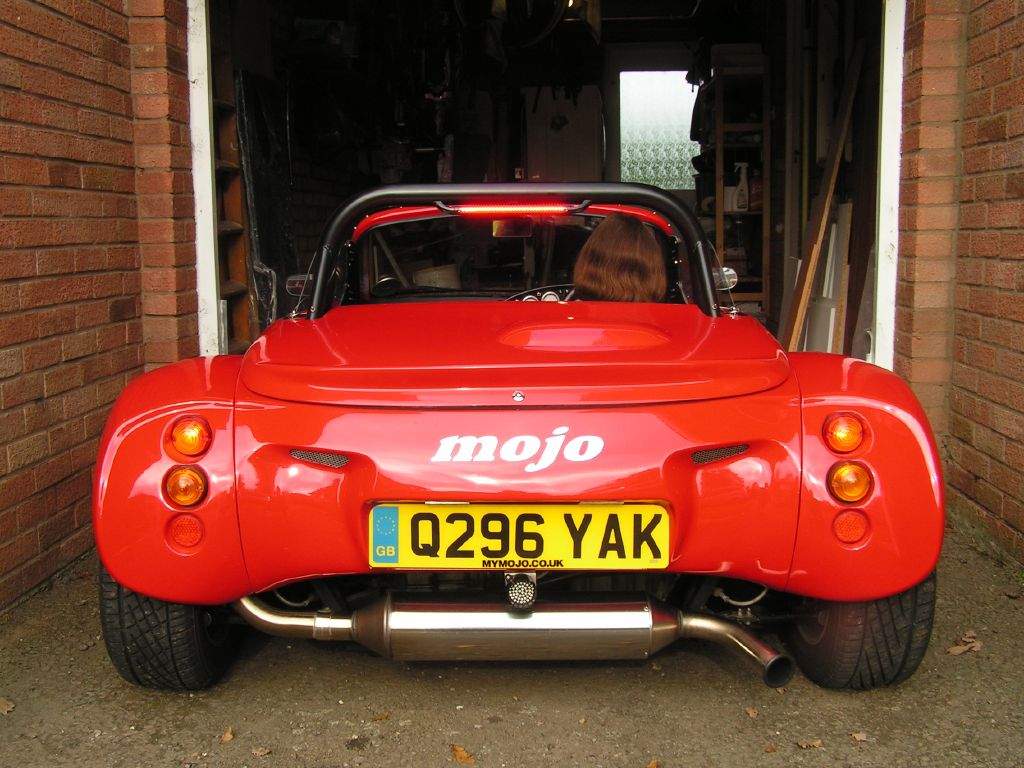
High Level LED Brake Light
The only real option is to mount to the roll bar on the Mojo, as the
rear bodywork does not have any flat surfaces. A quick search on the
Westfield boardroom found a few pictures of some installations. Some used
zip ties, and some were bolted to tapped holes in the roll bar. I was
initially unsure about drilling the bar, but decided that a couple of 4mm
holes were not going to make much difference in all reality, plus I didn't
like the 'unfinished' look from using zip ties. I then called in to my
local trade motor factors and picked up a 'Street Wize JS196 36 LED' brake
light for under a tenner.
The 2 mounting legs initially had a fairly large flat plate designed to
sit against the rear window in a 'normal' car. I trimmed these down as
much as possible, and then used some wet and dry paper wrapped around a
tube to form a curved profile on the 'feet' so that they would fit snugly
up against the roll bar. I then carefully measured the mounting points,
checked, double checked, and then centre punched, drilled and tapped the 2
holes.
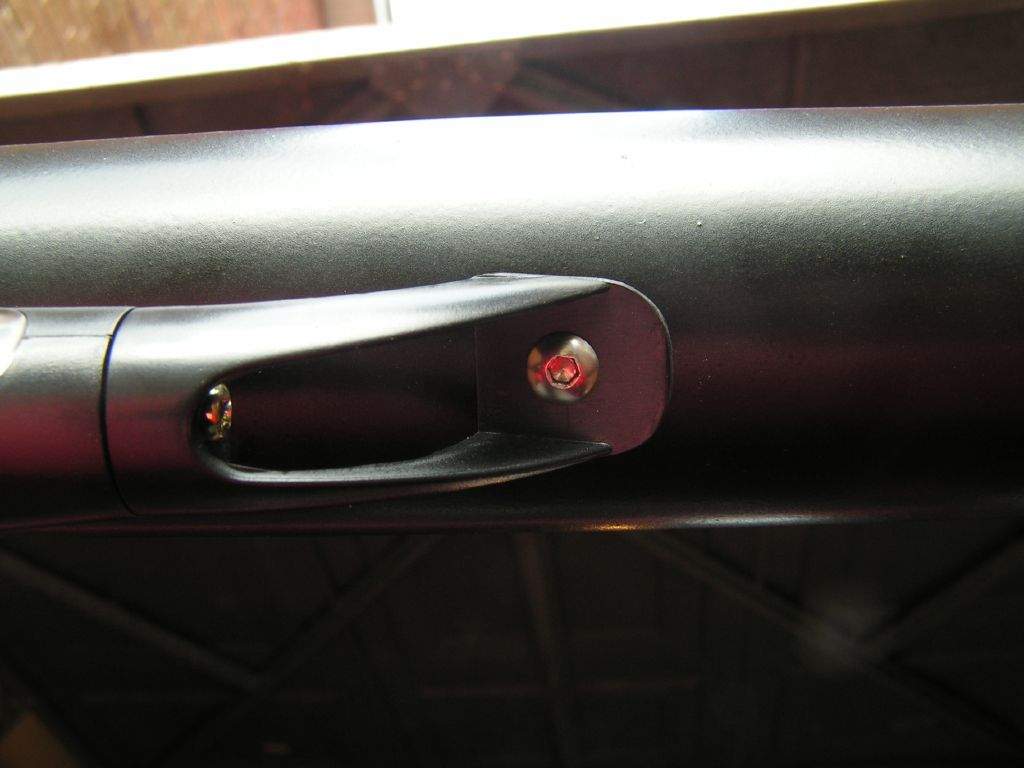
To minimise the wiring, I considered earthing the light directly onto
one of the mounting bolts for the LED, but decided that this could look
messy. So, I ran both the live and earth wires along the underside of the
roll bar and down to the nearside of the engine compartment. I covered the
wire with black insulating tape to disguise it as best as possible. I
conveniently had a spare earthing point on the chassis, and wired the live
feed in to the multiplug in the wiring feeding the rear lights.
I'm really pleased with the end result. Let's hope it encourages the
tailgaters to hang back a little...
UPDATE: The plastic mounting brackets both failed, and araldite
failed to rescue them for more than a few weeks. I therefore set
about fabricating some equivalents using aluminium T-section, which was
carefully cut to shape and then bent around to give the impression of an
expensive piece of bracketry! Photo to follow
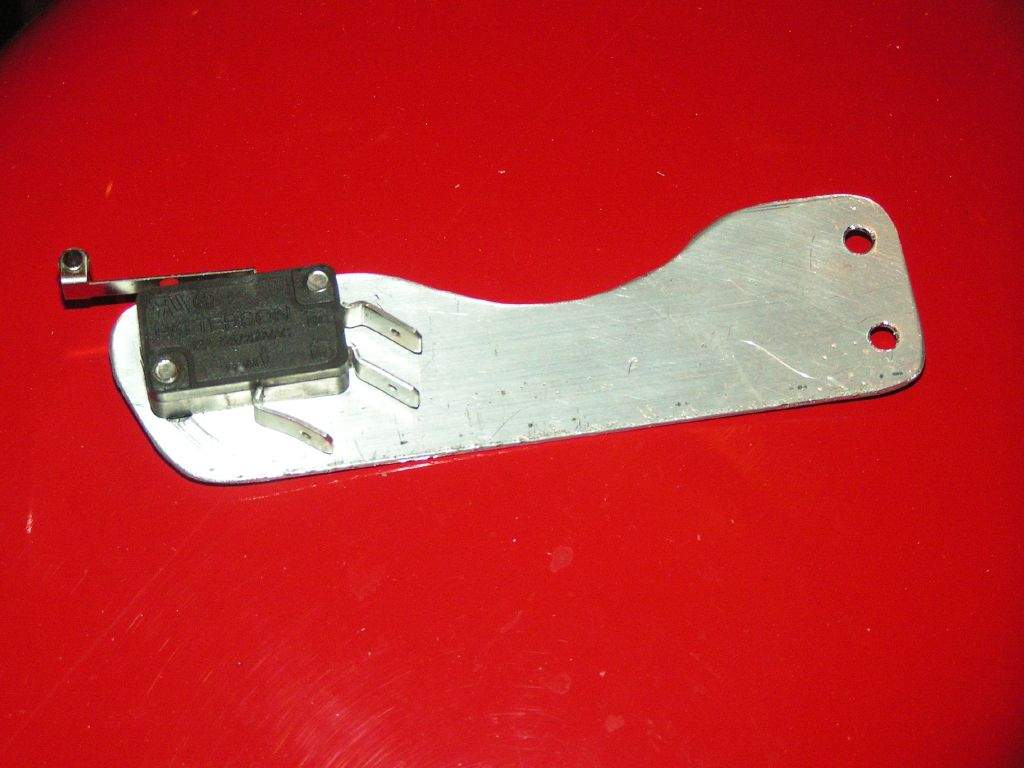
Brake Pedal Microswitch
I've now finally got around to fitting the brake pedal switch. The hydraulic switch has been
getting noticeably worse in recent weeks, to the extent that only a fairly abrupt stop would cause the
brake lights to come on (the high level brake light enables me to check fairly easily). With the
handbrake needing adjustment for the upcoming MOT, I had the tunnel panels off and the ECU out anyway,
so decided to use the opportunity to wire in the microswitch. First job was to work out where and how to mount the switch. I'm using it in a Normally Open
setup (the switch has 3 terminals to allow you to use it is NO or NC) such that with the brake pedal at
rest, the circuit is open. Hence I need the brake pedal to move away from the switch. The
obvious choice was to mount the switch to act on the pedal arm, but this would have to be on the driver
side of the pedal, potentially getting in the way of my foot. I made a temporary bracket, fitting
the switch fairly high up to contact the pedal arm just below the bias bar tube. A quick trial run
showed that this should clear my size 10s. I was concerned that the movement of the pedal arm would be insufficient to actuate the switch, given
that it was relatively close to the pedal pivot, but this didn't seem to be a problem. There was
also a very convenient place to mount the bracket, so I cut out a final version from some scrap
aluminium. The microswitch itself has 2 very small mounting holes for M3 bolts. I tapped these out to M4,
so that I could just use 2 M4 stainless bolts to mount it to the bracket. The bracket itself was mounted to the side flat of the angle section of the chassis that supports the
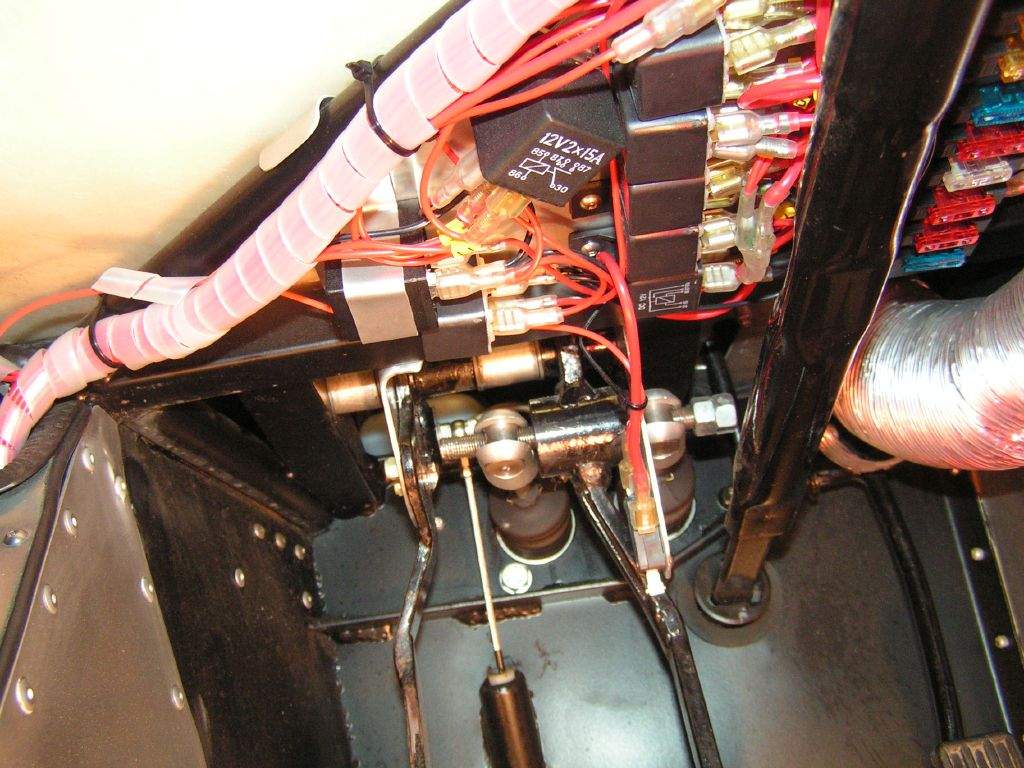
right hand end of the clutch and brake pedal axle. Sounds complicated? Here is a picture: The bracket is mounted to the side of the angle section in the bottom left of the picture. I
fitted 2 rivnuts to the bracket and drilled 2 holes through the chassis plate to enable 2 bolts to
secure the bracket. Wiring was the next job. I used a piggyback connector to get an additional wire from the
existing brake light circuit at the fusebox, and wired this to one of the terminals on the microswitch,
a very convenient run of about 6 inches! I then ran an additional wire down the centre
tunnel. I haven't gone to the trouble of re-doing all of the spiral wrap, so the new wire is just
cable tied to the loom at regular intervals. I then used another piggyback connector onto the
output from the original hydraulic pressure switch, maintaining the original switching circuit in
parallel to the new one. Connecting the other end of this new wire to the microswitch enabled me
to test the circuit, and all worked as expected, with the brake lights coming on with a very light touch
of the brake pedal. That's more like it! |
||||||||||||||||||||||||||||||||||||||||
|
|
||||||||||||||||||||||||||||||||||||||||||