|

|
|
|
Rebuild -
March 2012 to January 2013
After 7 years and 40k miles of trouble free
Mojo motoring, I suppose it was about time something went wrong... and
so it did! At the end of March, a cambelt tensioner failure led to the
inevitable belt slippage, and 16 bent valves in my trusty 1.8 Zetec-E.
The obvious fix was an engine swap, and with brand new 2.0 engines
available for £750 from Power Torque, 10 miles up the road from me in Coventry, I
seemed to have a solution.
Before collecting the new engine, I wanted to make some progress on
getting the car stripped down. With some willing helpers (thanks Ruari &
Giles!), the engine was
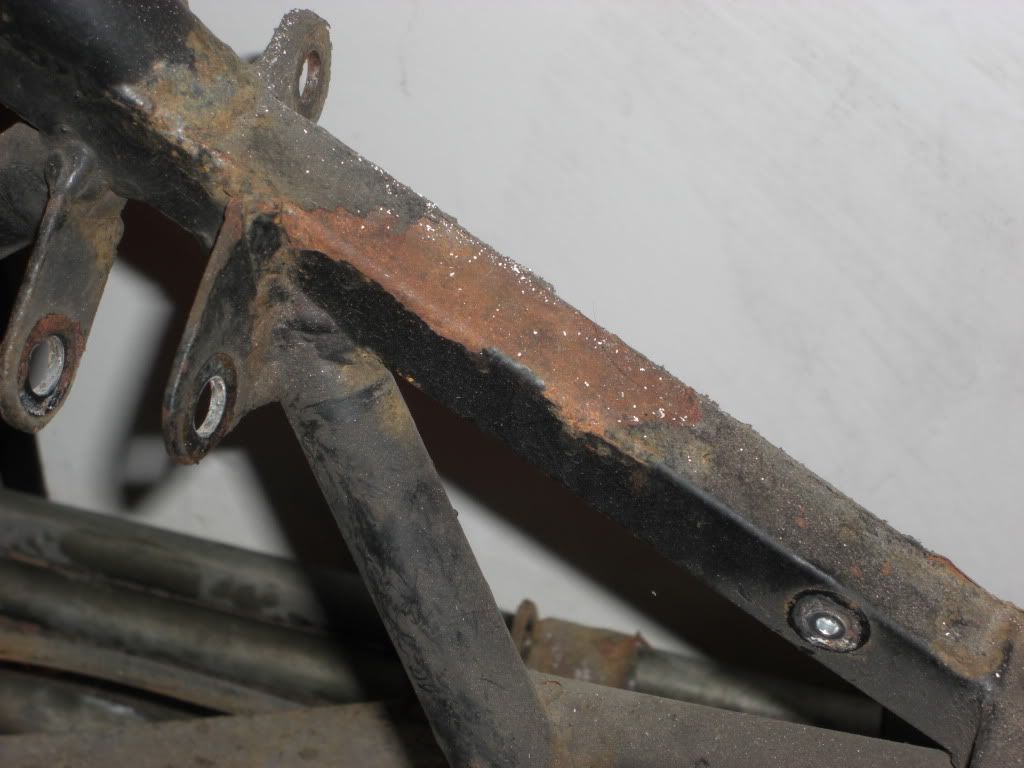
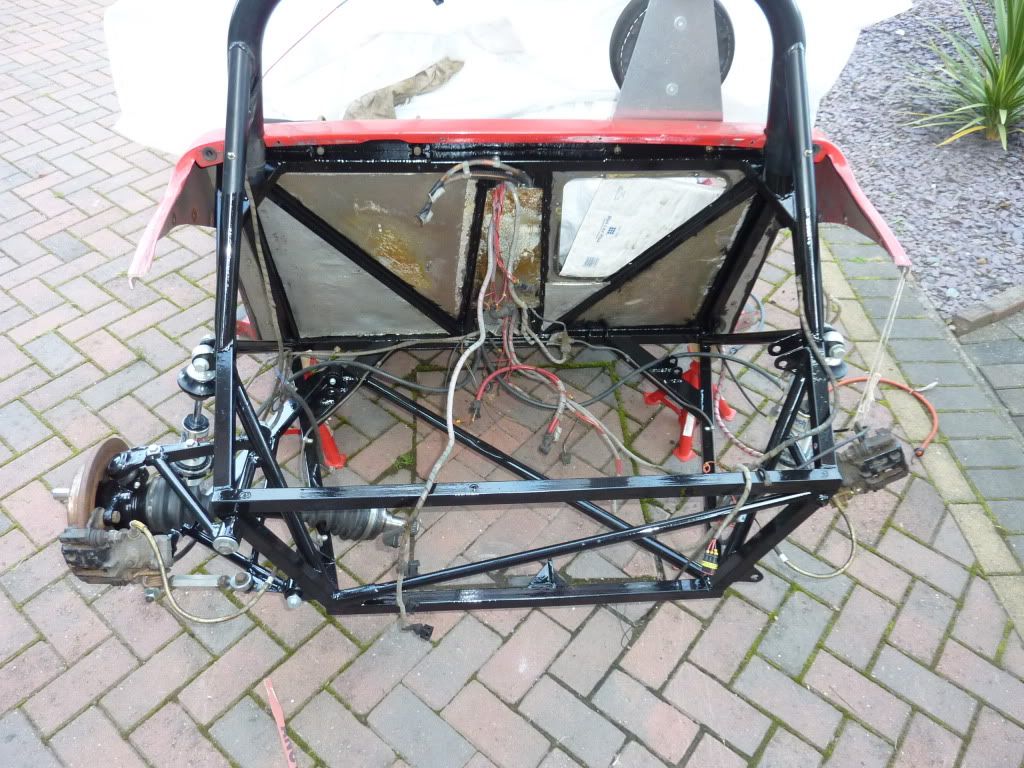
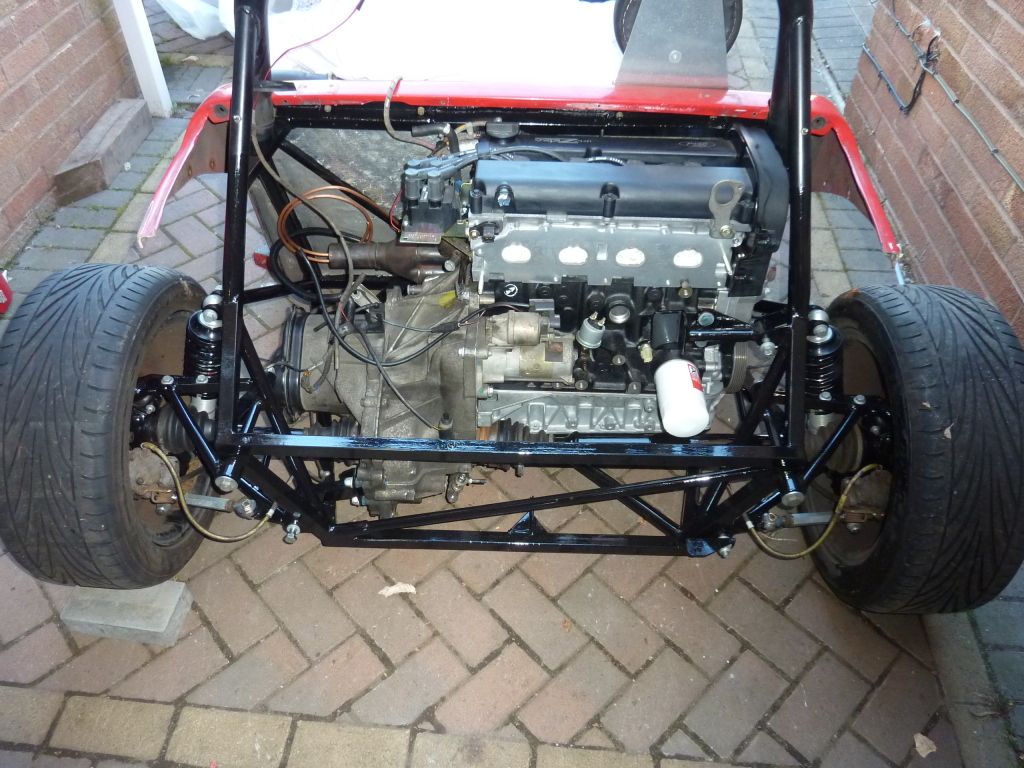
out fairly quickly. However this revealed the extent of chassis
corrosion that I was already partly aware of, so another job was added
to the list: strip back and repaint the rear end of the chassis
(everything behind the bulkhead).
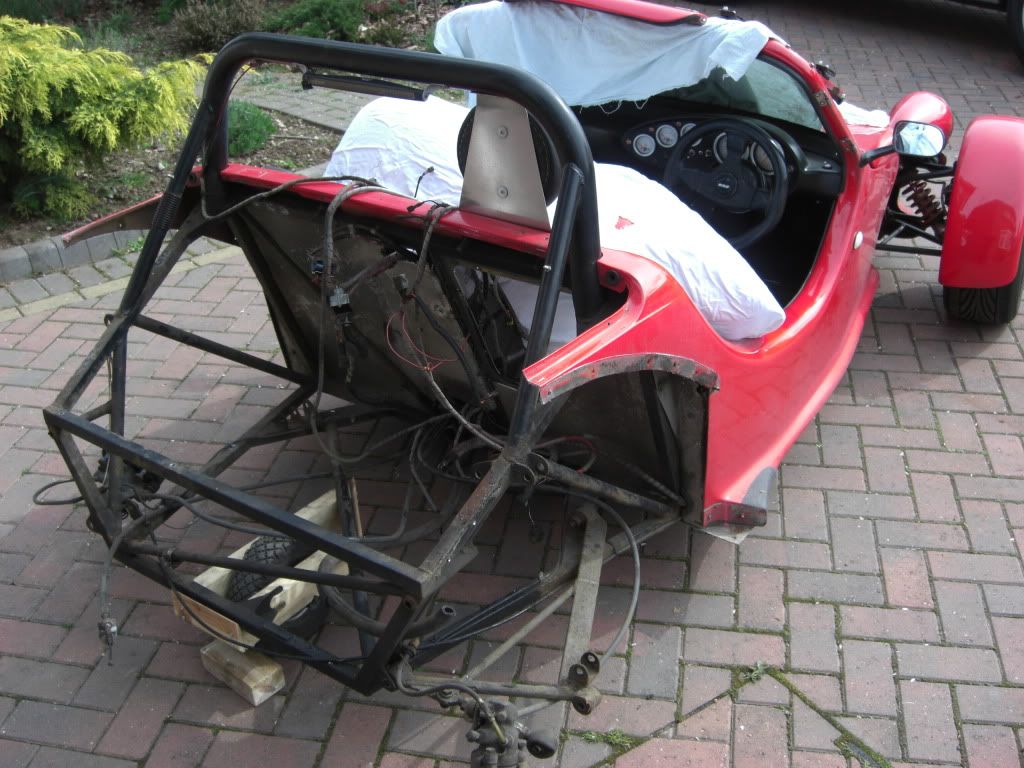
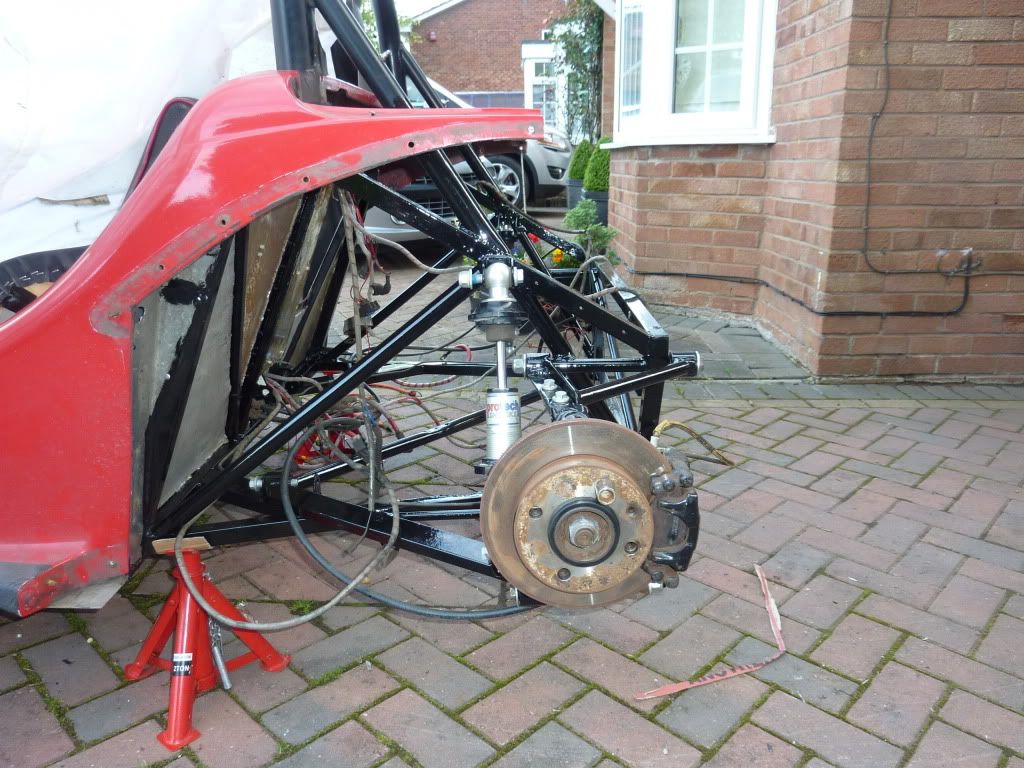
I decided that to make this easier, I would take the seemingly drastic
action of cutting off the rear section of the main body tub. The rear
wheel arches could be unbolted easily, but access was still restrictive,
so out came the hacksaw. The cut will be mostly hidden by the engine
cover (the later Mojo SE has a join here, with the rear arches and
centre section in one large rear section).
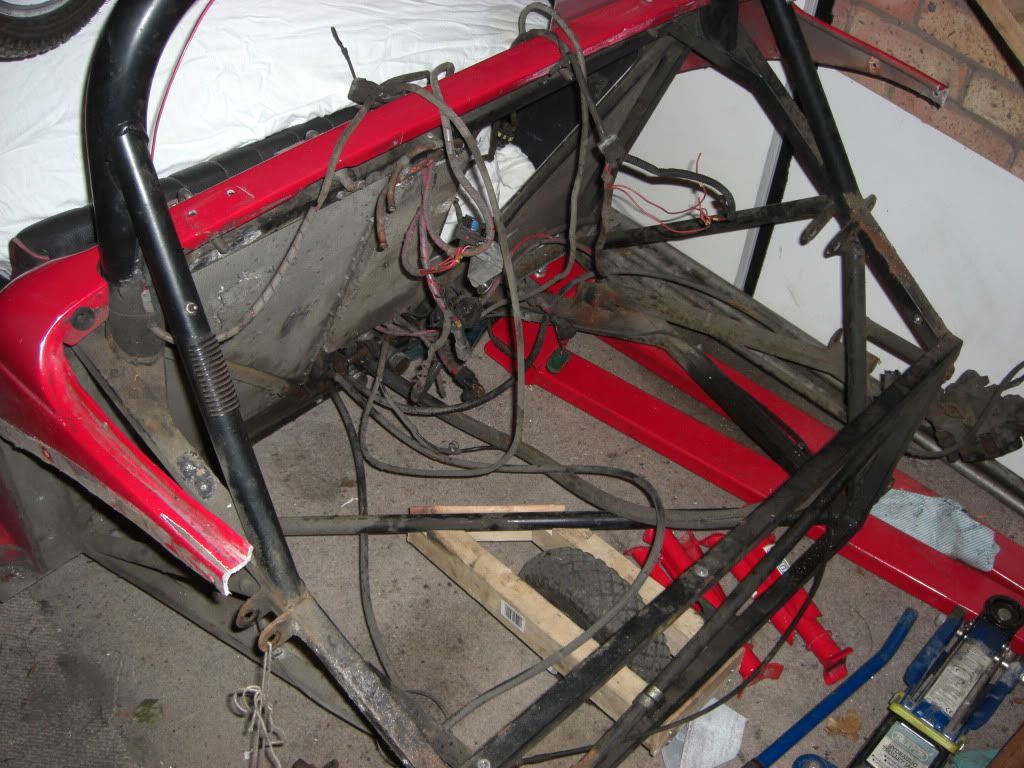
The car was then stripped back to a bare chassis, with only the brake
pipes left in place so that I didn’t add a full brake bleed to the list
of jobs. I made up a simple wheeled dolly to keep the car mobile, as
most of the work would be done on my driveway, the single garage just
too restrictive! A combination of wire brush attachments were used to
get the chassis & suspension parts back to bare metal.
Some ‘opportunities’ then added further jobs to the list... The previous
gearbox (from a 1987 XR2) had been getting slightly noisier, and had a
weakening synchro on 3rd gear, so it seemed a good time to swap given it
was out of the car. Having heard Jeremy singing the praises of the
hydraulic concentric clutch cylinder setup used in the later Zetec SE cars, I was
also keen to convert from cable to hydraulic clutch, however the Zetec
SE gearboxes don’t work with an iron block Zetec-E due to different
bellhousing patterns.
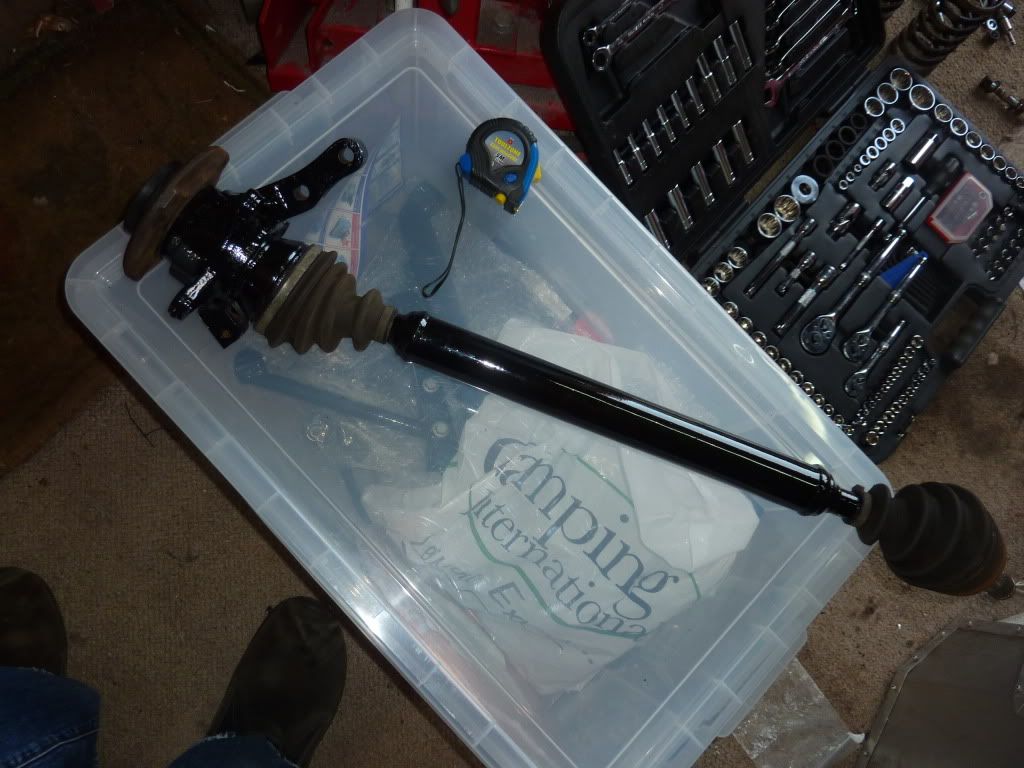
A lot of googling later and I found what I thought might be a solution.
It seems that there are a few Ford Ka Zetec-E conversions around, which
retain the standard Ka gearbox. The early Ka engine was a Ford Kent
derivative, so shares bellhousing pattern with the Zetec-E... and the Ka
uses a hydraulic clutch! Bingo. A year 2000 Ka gearbox was sourced from
a Birmingham breaker via ebay for a bargain £35 (Note that when the Ka
changed to the Duratec badged engine around 2003, the gearbox
bellhousing changed too, so isn’t suitable). Once home, I trialled this
to confirm if it would work with the existing gearbox mounts. The rear
mount appeared to work fine, and the forward mount (which is a 3-legged
spider fabrication) aligned with 2 out of the 3 mounting holes. This was
an expected issue, as the Ka gearbox has a rear mounted starter motor,
vs the front mount starter of the original Fiesta gearbox, and the
spider mount bolted to the starter motor mount area. The fact that 2
holes did align was a success! A bit of fabrication with some plate
steel resulted in an adapter to join the third hole on the mount to the
gearbox.
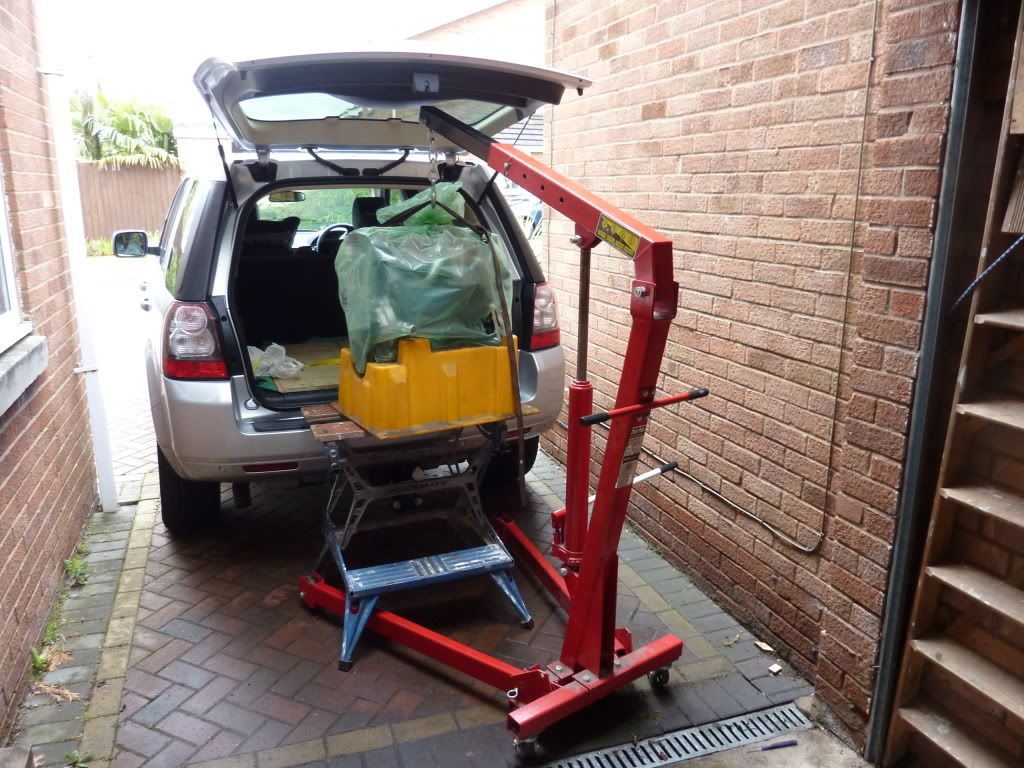
The new engine was collected, and brought home in the boot of my
Freelander. Loading was done with a forklift, unloading with a
combination of the trusty black & decker workbench and a borrowed engine hoist!
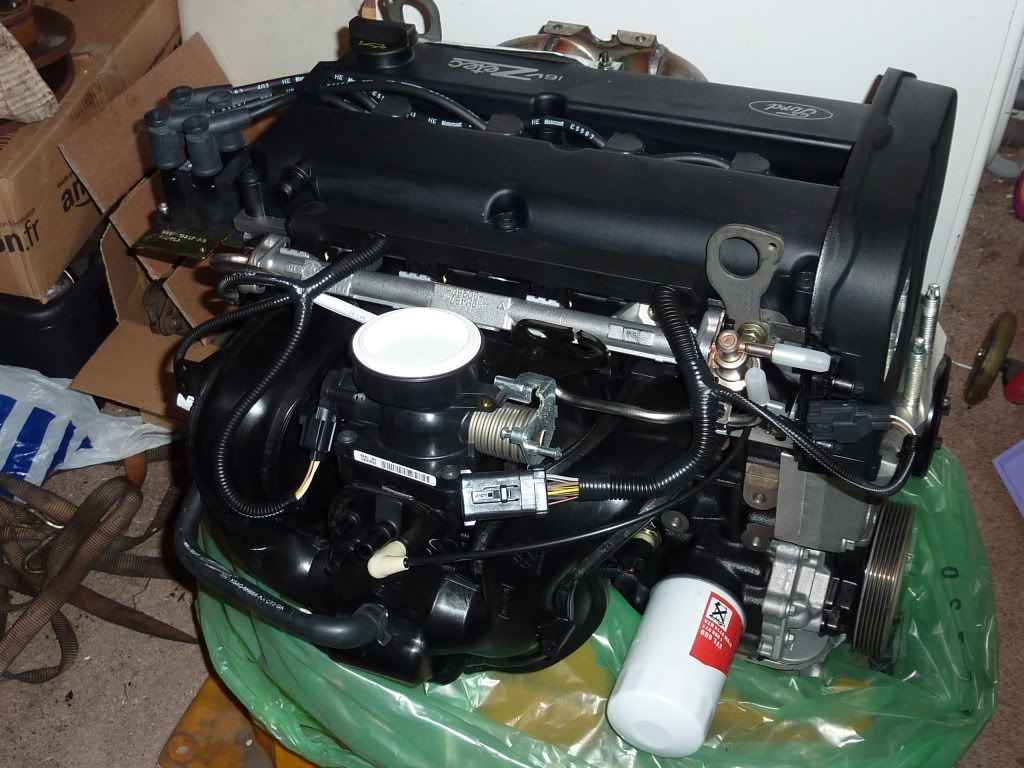
The first job was to strip off and unnecessary parts: inlet & exhaust
manifolds, flywheel, clutch & thermostat housing. These would make back
a couple of hundred quid on ebay, offsetting the cost of the new engine!
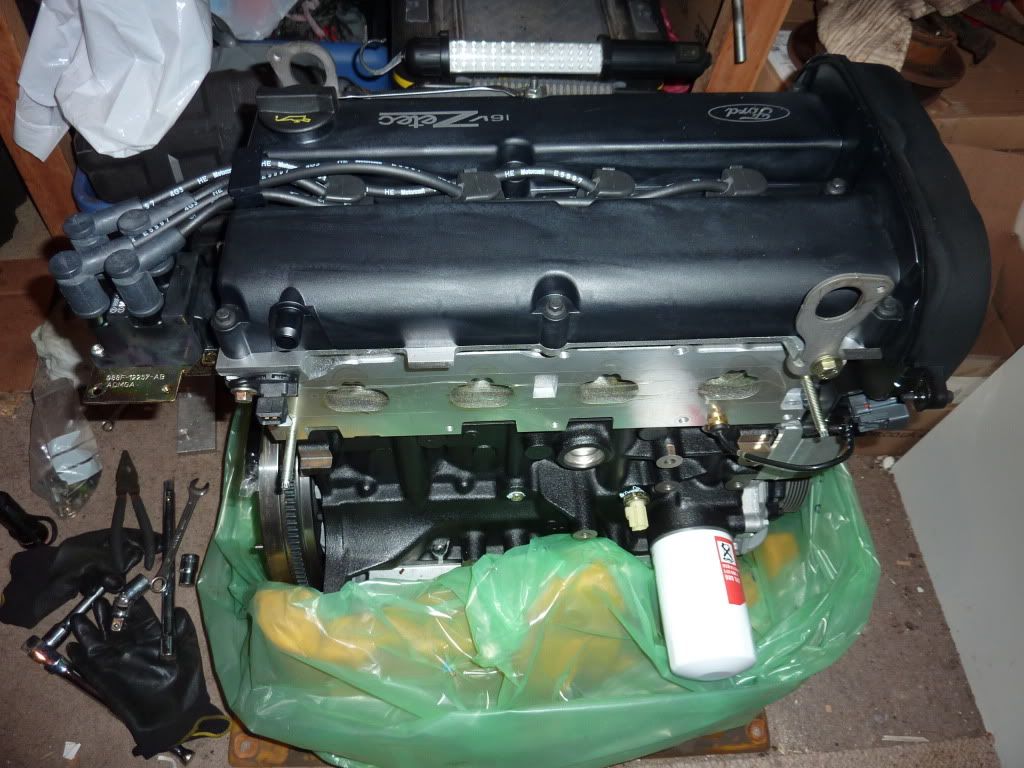
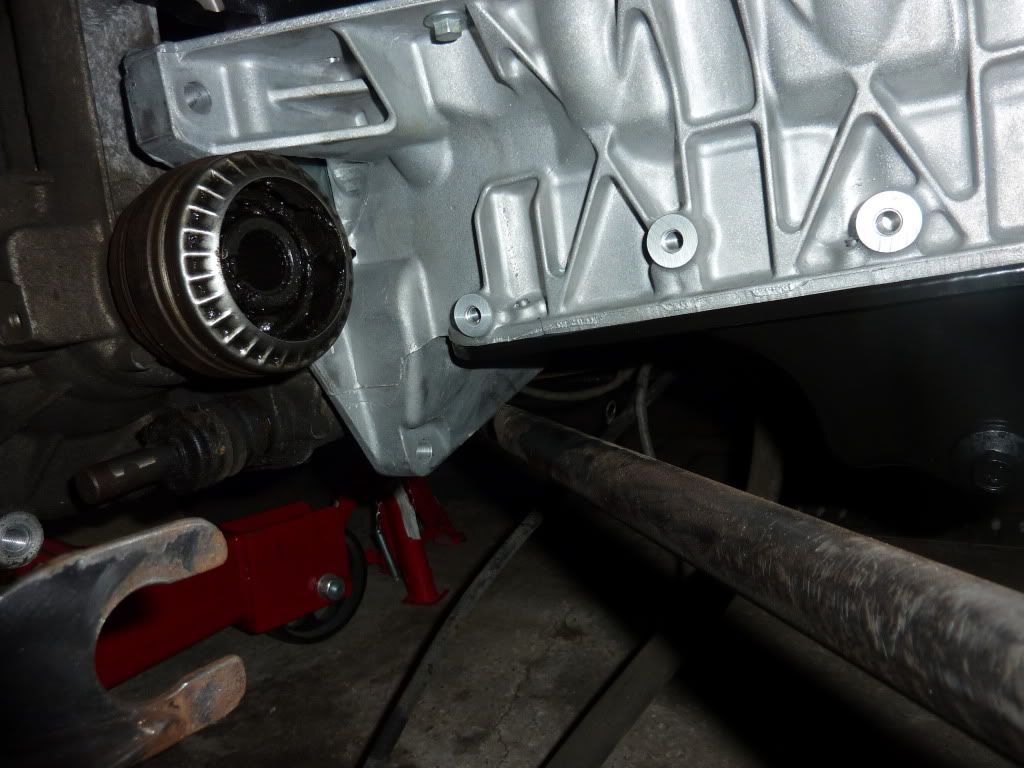
The engine and Ka gearbox were then offered up to each other to confirm
the fit, and all looked good! The bellhousing end of the sump required
some grinding to clear the diagonal lower chassis rail (the Zetec I
bought is designed to mate to an MTX75 gearbox which has a different
profile to the lower part of the bellhousing) and a series of trial fits
were needed to take off just the right amount. All of these mods only
affected the bellhousing flange of the sump, so the sump retained its
integrity and oil capacity. Some further slight mods were also required
to ensure clearance to the inner CV joint, and the rear right engine
mount required a modification to align all 4 bolt holes.
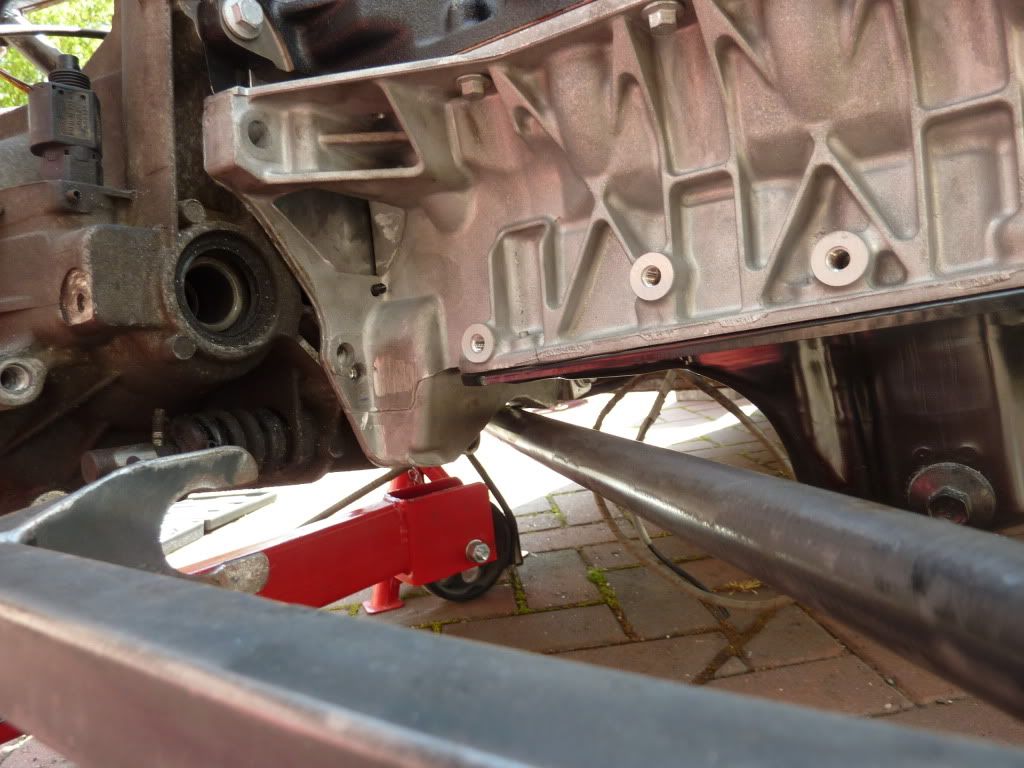
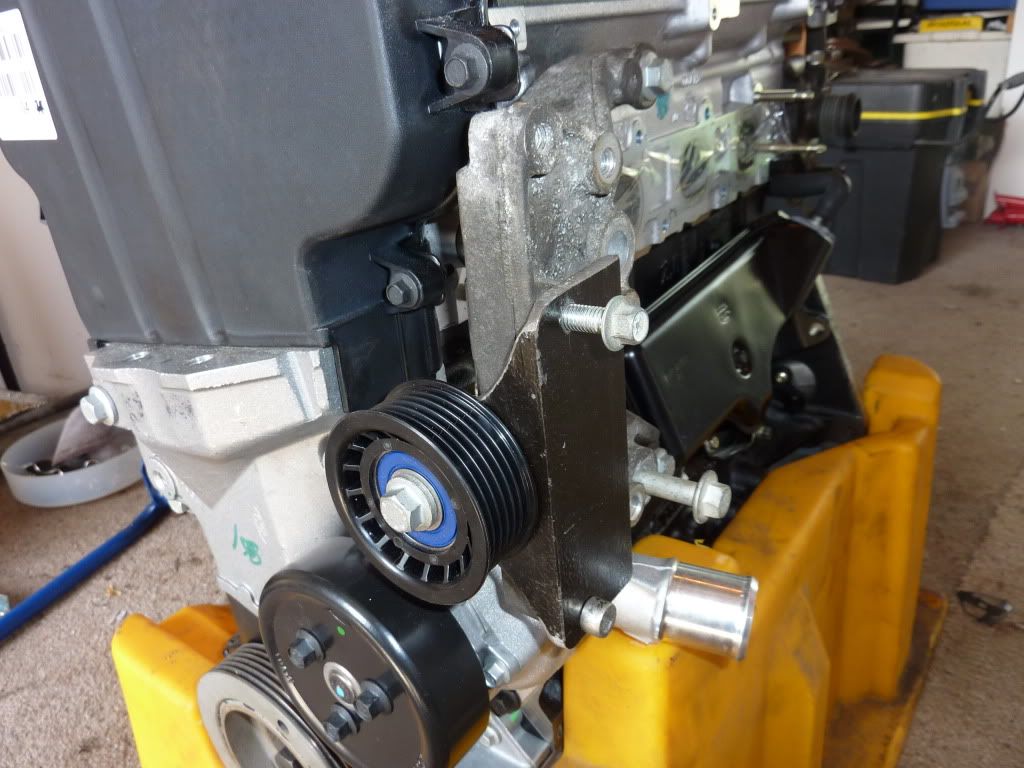
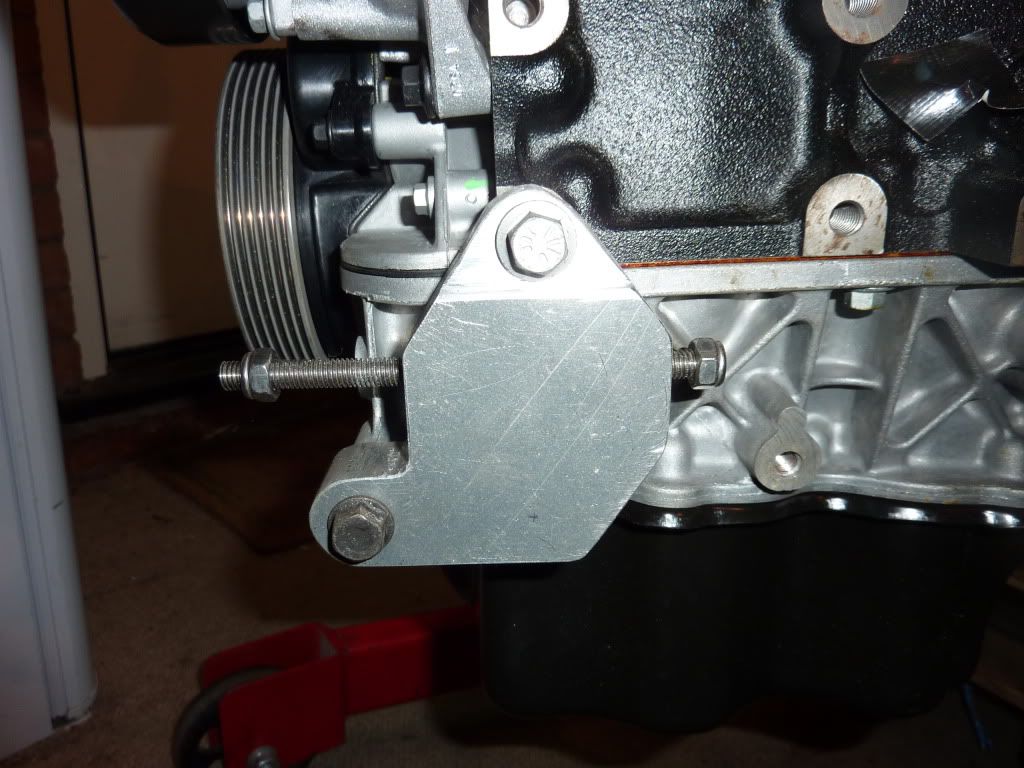
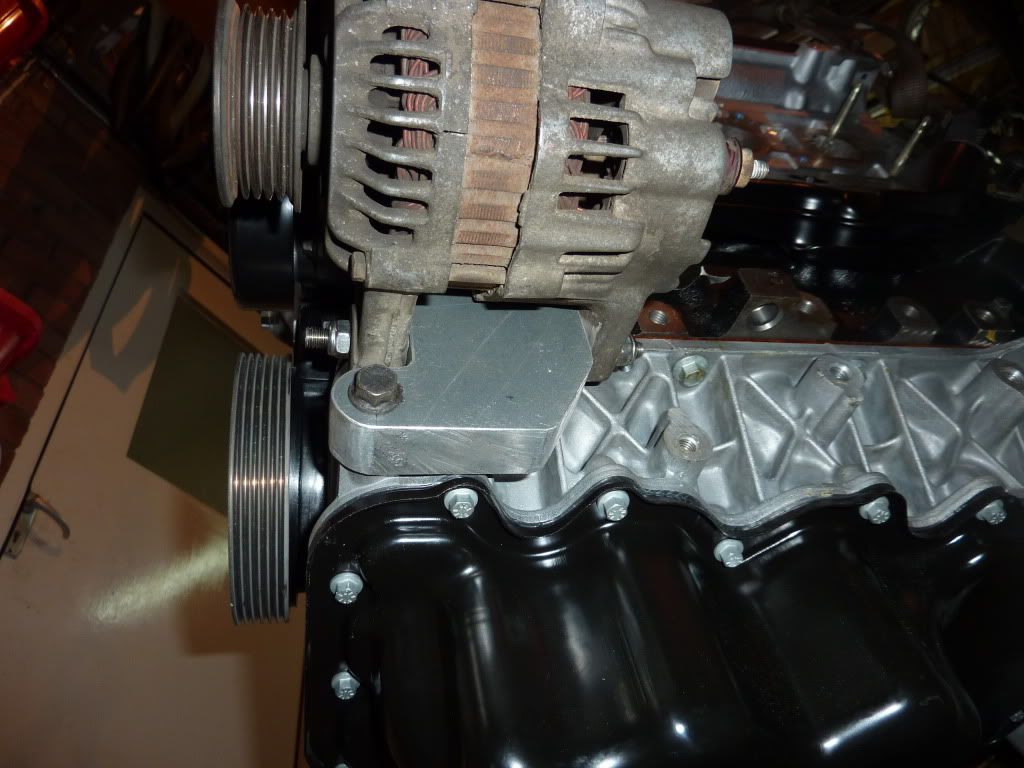
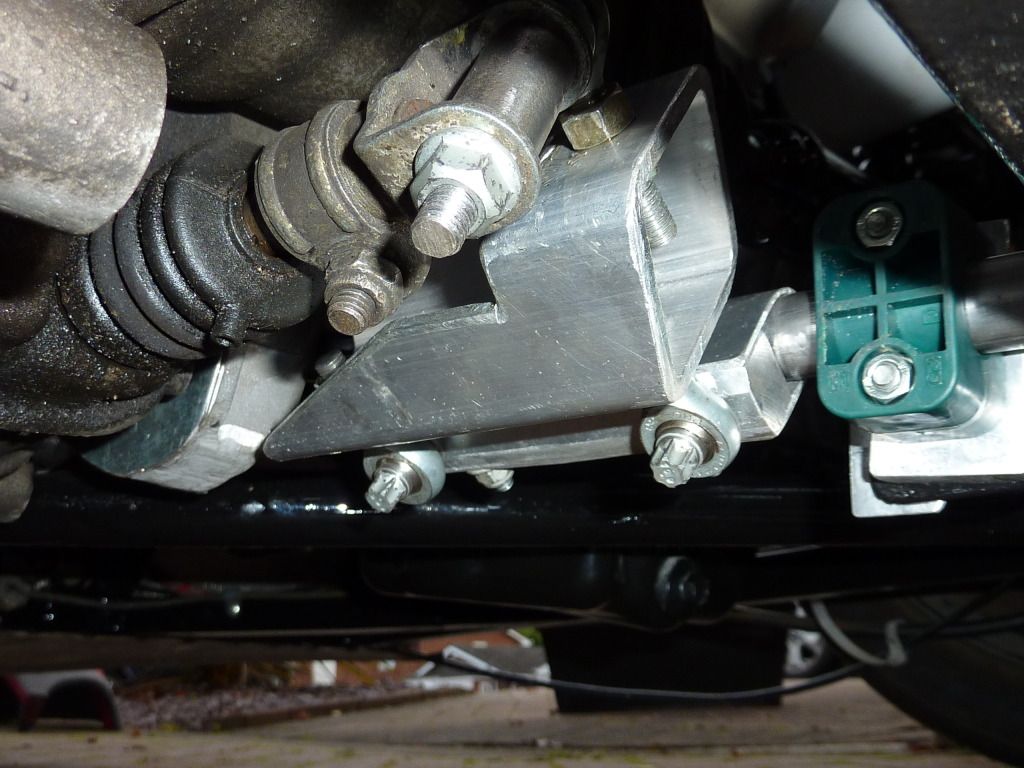
The new engine also meant a few extra challenges. First of these was the
need for an idler pulley to ensure the water pump runs in the correct
direction. A new pulley was sourced, along with a power steering bracket
from a Focus. The bracket was cut down in size, and an extra piece of
angle section steel was fabricated to create a sturdy mount for the
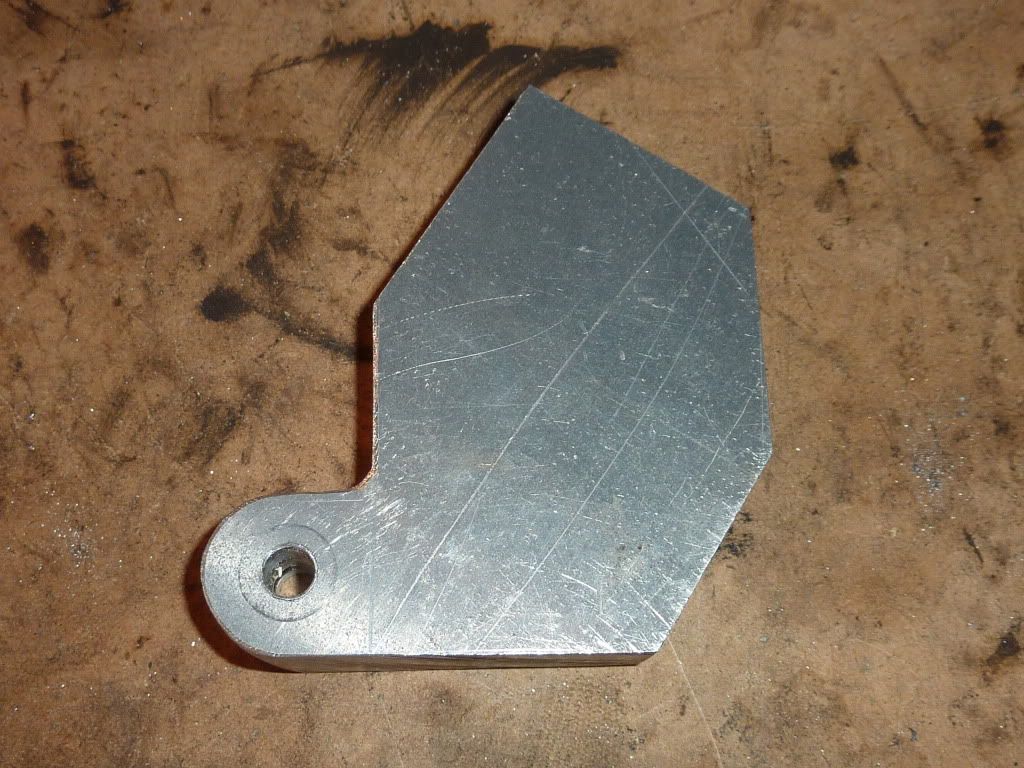
pulley. The alternator also needed a new mounting bracket, which I chose
to mount off some convenient threaded mounts on the block and sump. This
has fabricated by hand from a solid lump of aluminium - hard work!
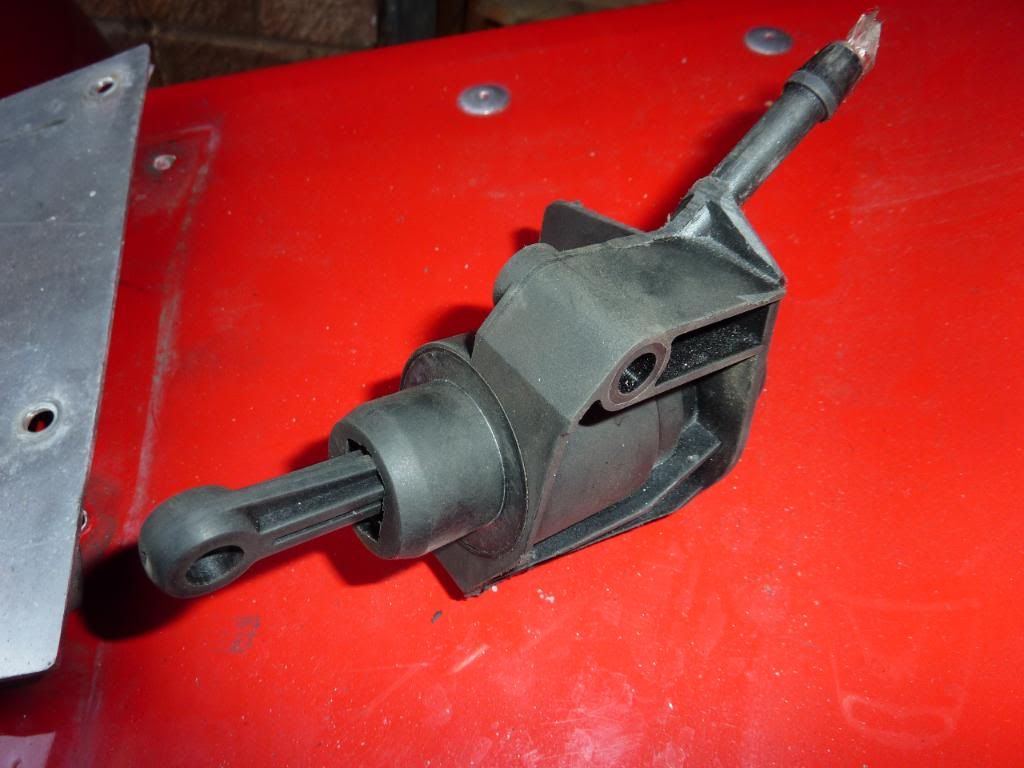
The hydraulic clutch conversion of course meant some changes elsewhere
in the car, namely a modification to the pedal box and the installation
of a hydraulic line. I chose to use a standard Ka master cylinder such
that the whole setup was standard. I began a partial strip down of the
front of the car to enable better access to the pedal box. In the
process of doing this, the poor state of the front end of the chassis
became more apparent, and so once again a whole load of additional jobs
were added to the list, with a complete strip down of the front end of
the car to sort out the corrosion.
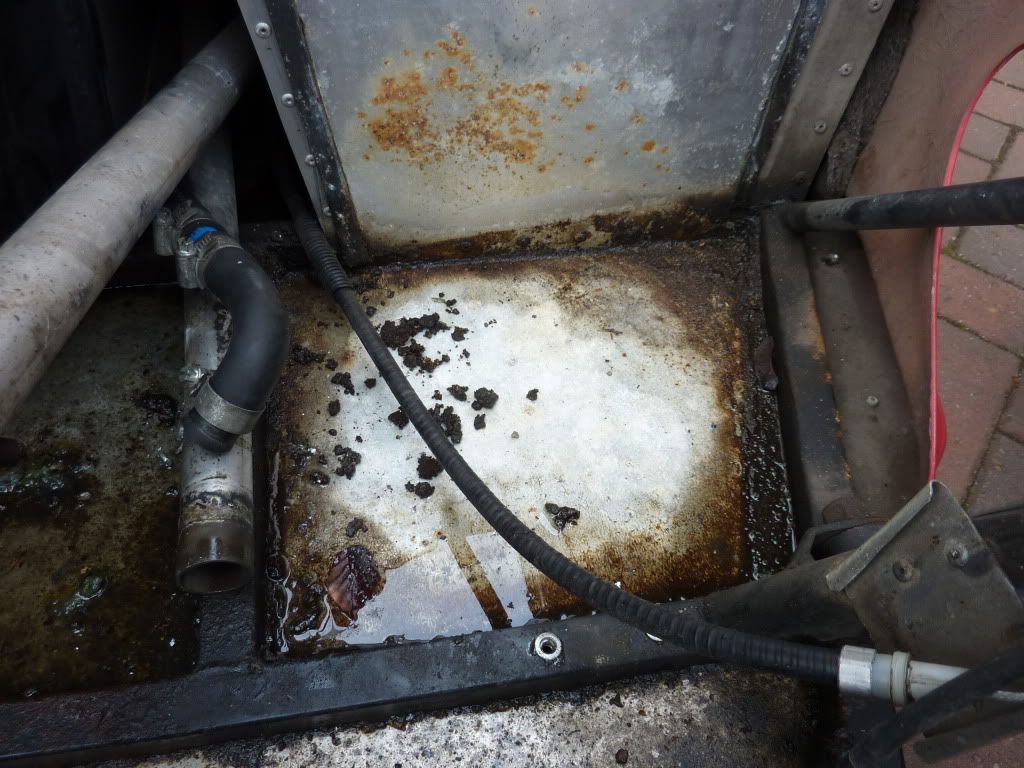
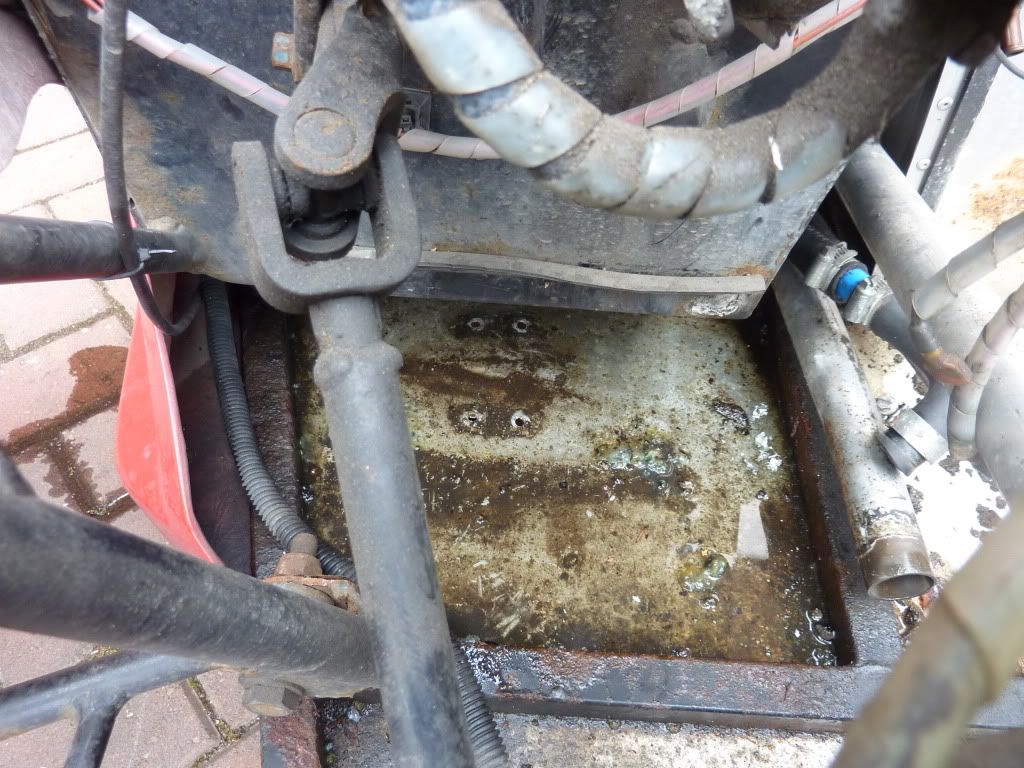
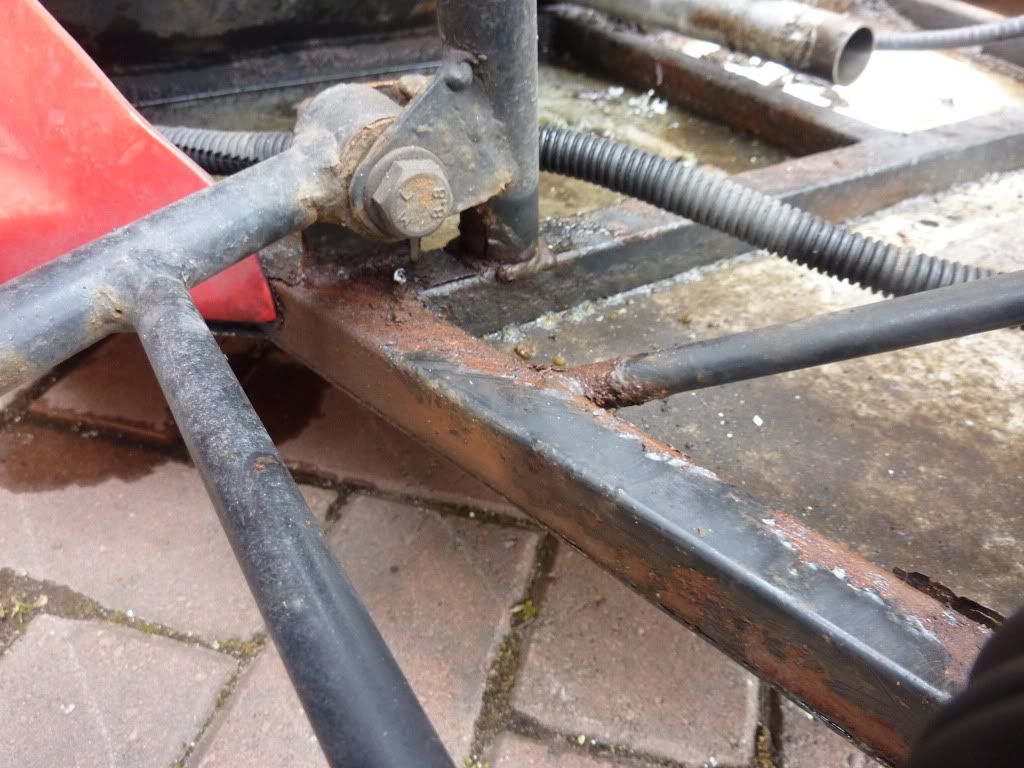
The upper members of the chassis were actually in excellent condition,
it was just the lower members which were in a very sorry state. These
are exposed to road spray from the front wheels, and the nature of the
design, with a flat aluminium floor from the very front of the chassis,
means that any water that gets in to this area tends to sit on the
floor, lapping against the chassis... it had taken its toll!
Ideally the floor would have been removed completely but I decided to
leave it in place, in the knowledge that when fitted it was sealed in
place with car body sealant and hundreds of rivets, and would be an
absolute pig to remove. I therefore stripped back the accessible parts
of the lower front chassis, and repainted with POR15. Whilst I was at
it, the lower wishbones and steering rack were repainted too.
The new master cylinder was then installed, this was very tight to
package in the space available, but the end result looks as though it
was designed that way from the outset. A motorcycle clutch fluid
reservoir was used to feed the master cylinder.
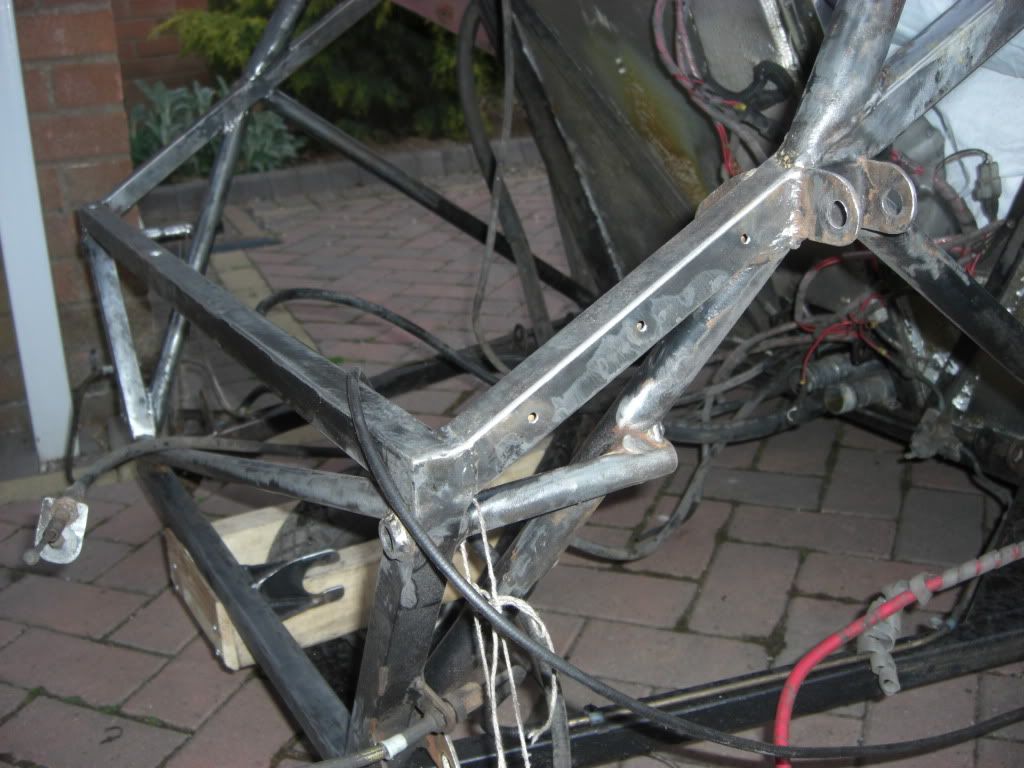
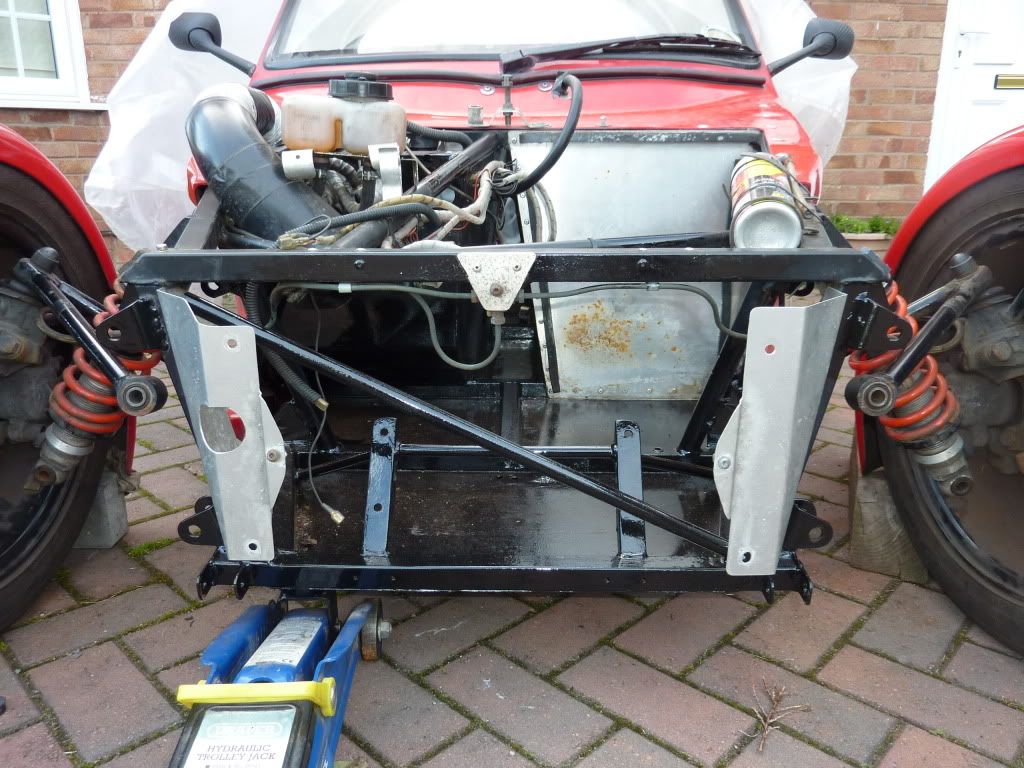
With all the trial fitting complete, I then continued to repaint the
rear end of the chassis and suspension parts.
With the chassis renovations complete, it was time to start the rebuild.
In the process I took the opportunity to make a few improvements here
and there:
-
Re-wired the throttle sensor and crank sensor with shielded cable
-
Added an air temperature sensor for the Emerald ECU to use for air temp
correction
-
Formed an inner wheel arch to the rear left corner to try to reduce the
amount of road spray that is thrown into the engine compartment (rear
right already had this as the air filter lives in that area)
-
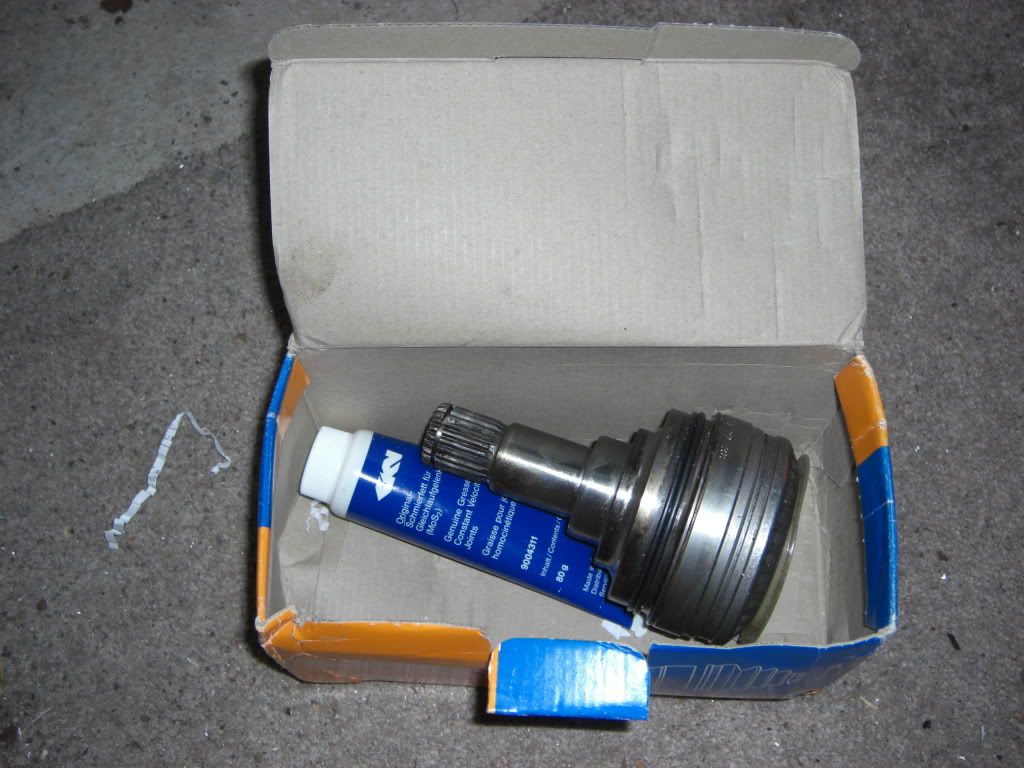
Replaced a clonking inner driveshaft joint
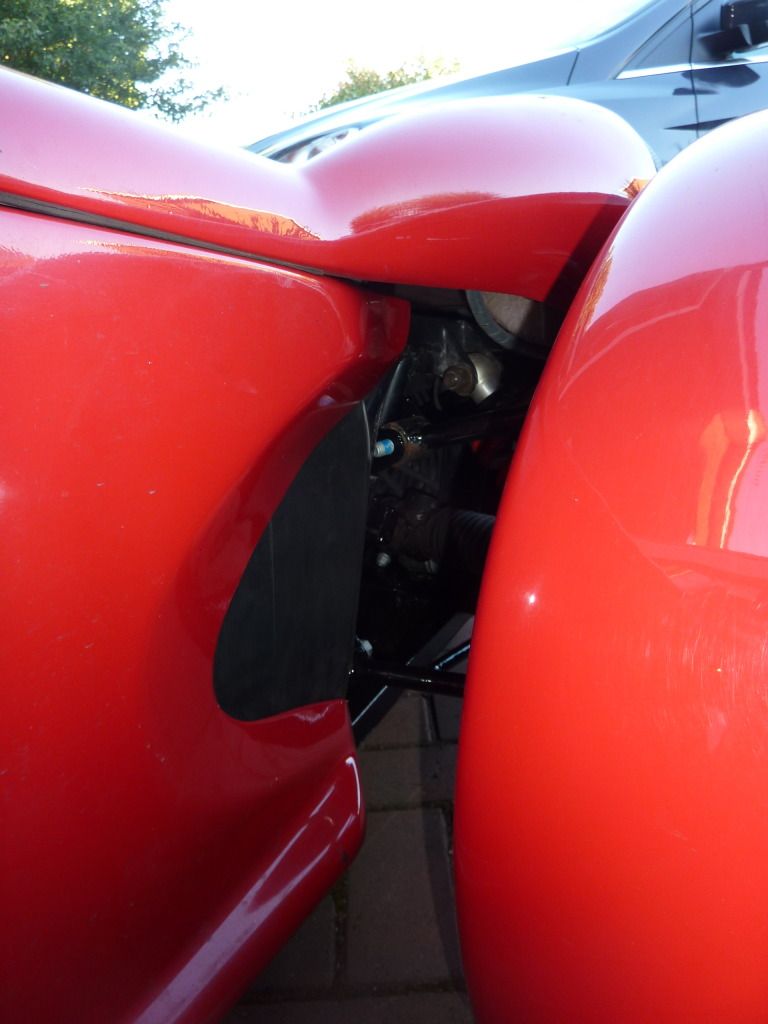
-
Partially filled in the opening in the
bodywork inboard of the front wheels to reduce the amount of water
ingress
-
Drilled small drain holes in the corners
of each floor section between crossmembers at the front end
-
Removed the original aftermarket speedo
sensor and switched to the electronic pickup integrated in the new
gearbox
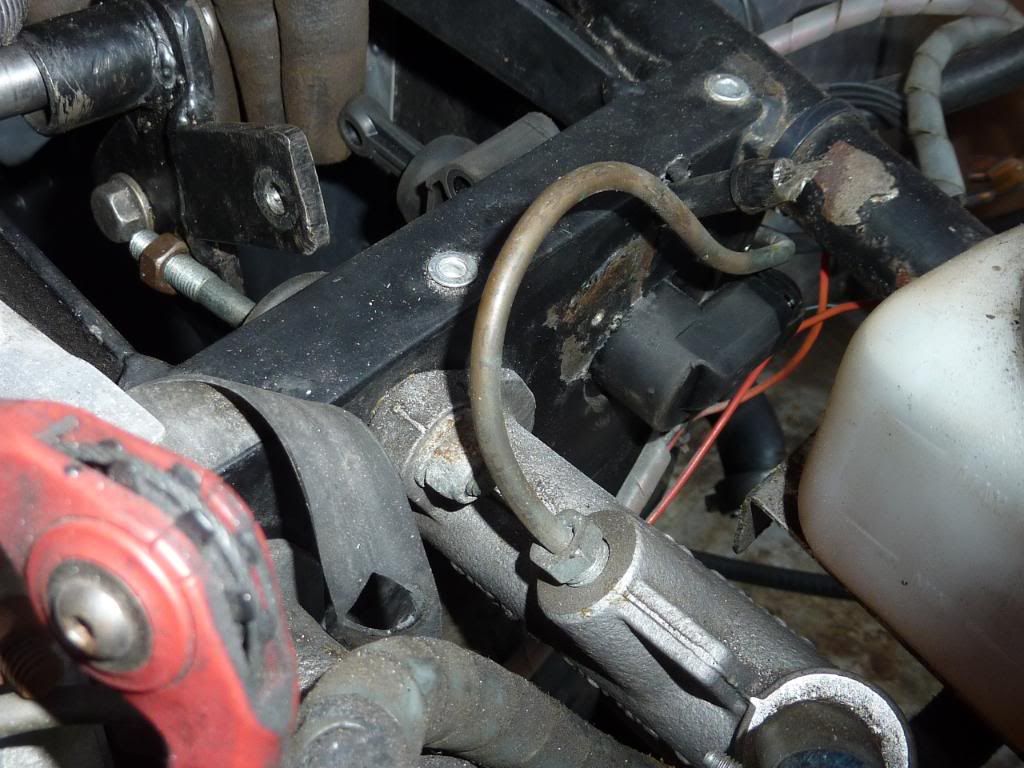
With the engine and gearbox back in place, the hydraulic clutch line was
connected up. Initial testing caused a few headaches, as the clutch
didn’t seem to release fully - when parked in gear on my sloping
driveway, pressing the clutch pedal didn’t cause the car to roll. I had
initially bled the conventional way, pushing fluid through using the
pedal, but suspected there was still some air in the system. I therefore
tried pressure bleeding in both directions, but still with little
improvement. The clutch was clearly releasing most of the way, as the
car could be encouraged to move down the driveway with a good shove, but
it didn’t want to roll of its own accord. I had to decide whether to
plough on, or take the engine back out to check that the slave cylinder
was installed correctly... I decided that the ultimate way to test the
clutch was to get the engine running, so pressed on in the hope that it
would turn out ok!
Another couple of weeks later and it was time to fire up the engine. It
brought back memories of the original first start back on 9th May 2004!
That had been on an old set of Weber carbs, and took a bit of fiddling
to get going. I converted to injection in 2006, so hoped for an easier
first start this time around. I decided to leave the old 1.8 map alone
for the first try, so primed the fuel system and checked for leaks. Glad
I did too, as fuel was dripping from the fuel rail! That was quickly
sorted and it was time to turn the key for the first time.... and a dull
‘thunk’ from the starter confirmed that the battery was not in a good
state! Jump leads to the rescue, and time to try again... and it fired
within a second or so and ran smoothly from the off! Fantastic! There
was a brief moment of panic as a bit of smoke appeared, but it turned
out this was just from the outside of the exhaust which had been given a
good clean and polish, and the residue was just burning off.
Now to try the clutch...
At this point I didn’t have a functioning gear linkage, so first gear
was selected (with engine off!) by moving the selector on the gearbox
directly. Then I sat in the car, and cautiously tried starting the
engine again with the clutch depressed, expecting the car to leap
forwards due to clutch drag. However, it started normally, and lifting
the clutch pedal demonstrated a lovely light action and mid-travel bite
point and I was on my way up the driveway! Phew, the clutch was ok!
The final hurdle to cross was the gear linkage. Due to the different
sump design of the later Zetec, the old setup (rod for fore aft, cable
for across the gate) would not carry across. I was keen to
adopt the later setup used on the Riot (single sliding and twisting rod
setup from a Fiesta), but Jeremy Philips’ solution with 2 universal
joints to accommodate the offset between lever and selector would simply
not package in my Mojo, which has a shorter wheelbase than the Riot and
Mojo SE (all of the difference between rear bulkhead and engine). I got
hold of a Fiesta linkage anyway, to see if I could adapt it to work...
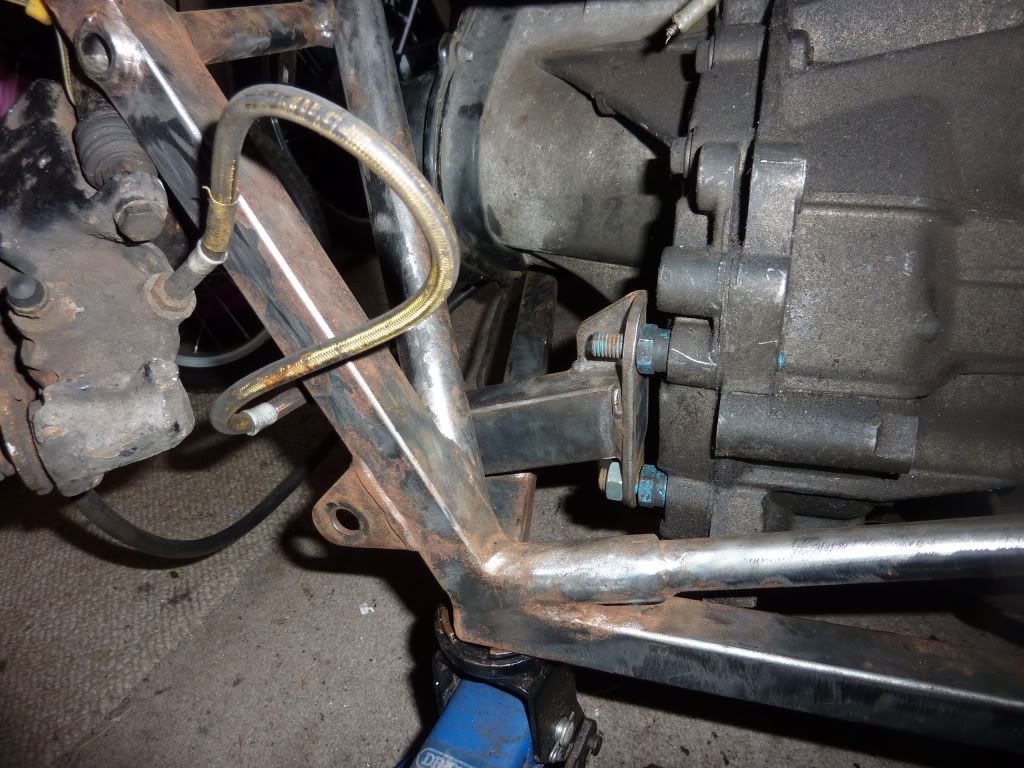
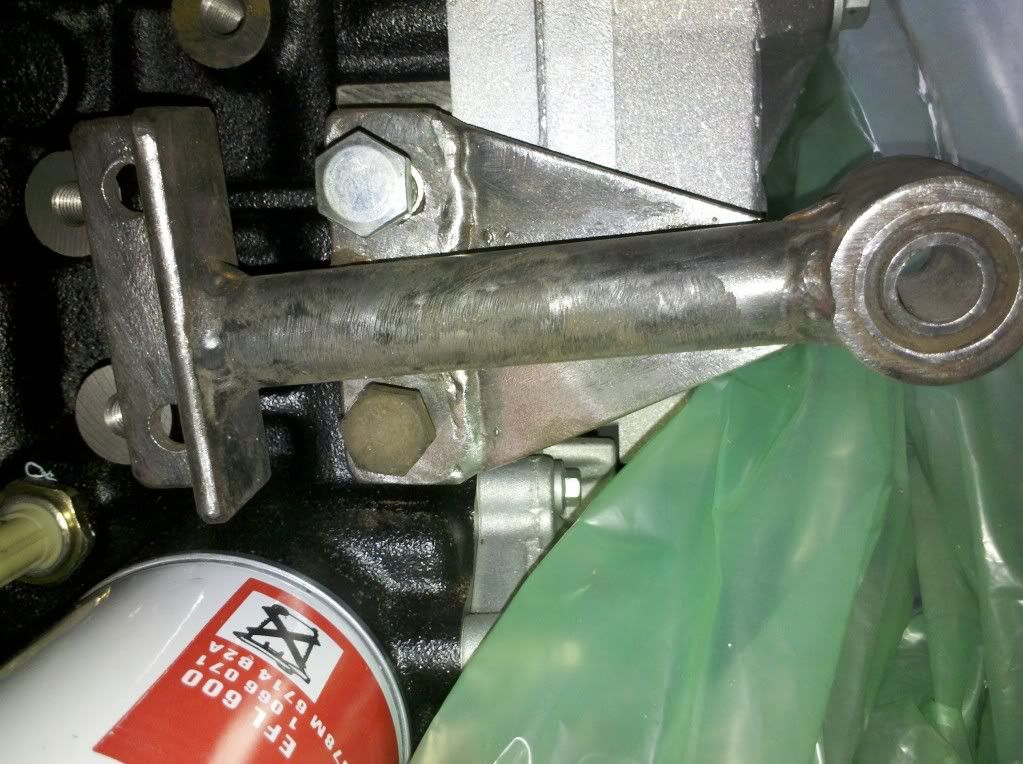
I then spent many hours pondering an alternative solution. Even my
old Lego Technic was wheeled out for trialling a few ideas in double
quick time! I discovered that I had a line of sight from the area below
the gear lever in the tunnel, all the way through to the back of the car
on the centreline, so a rod would fit. However the selector on the rear
of the gearbox is offset from centre-line by about 6 inches. I decided
that I should be able to transfer the sliding and rotating motion using
a linkage with 3 rose joints. After a lot more thinking and fabrication
time, I came up with something which looked like it should work, but the
proof would be in assembling all the parts and trying it out!
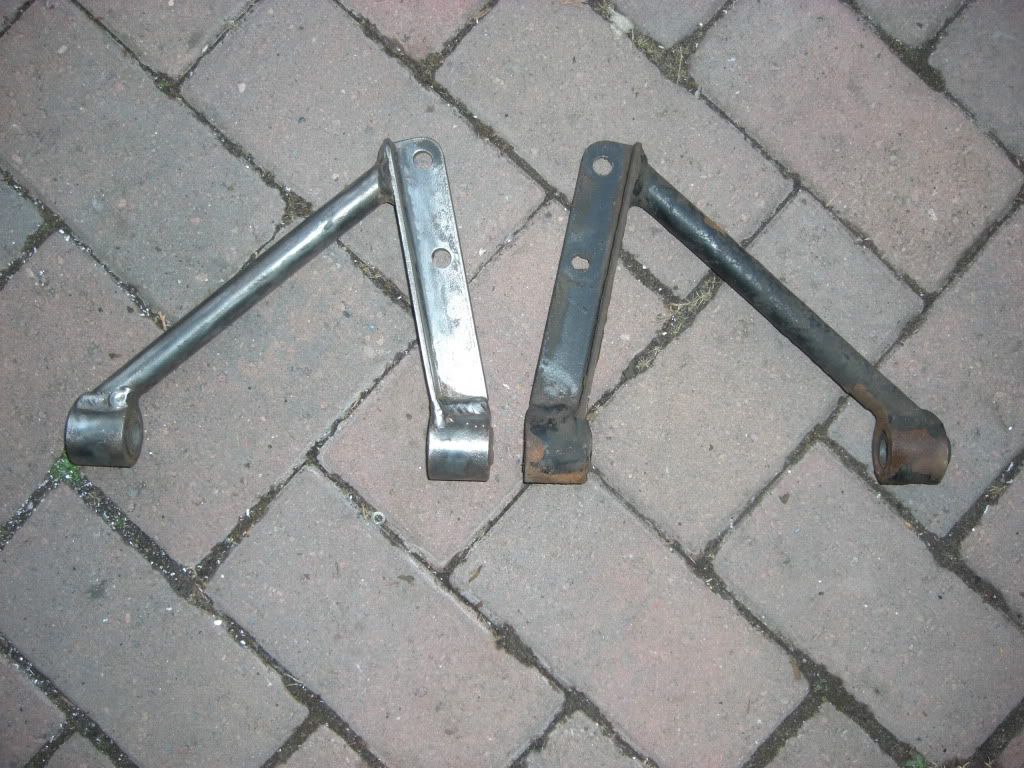
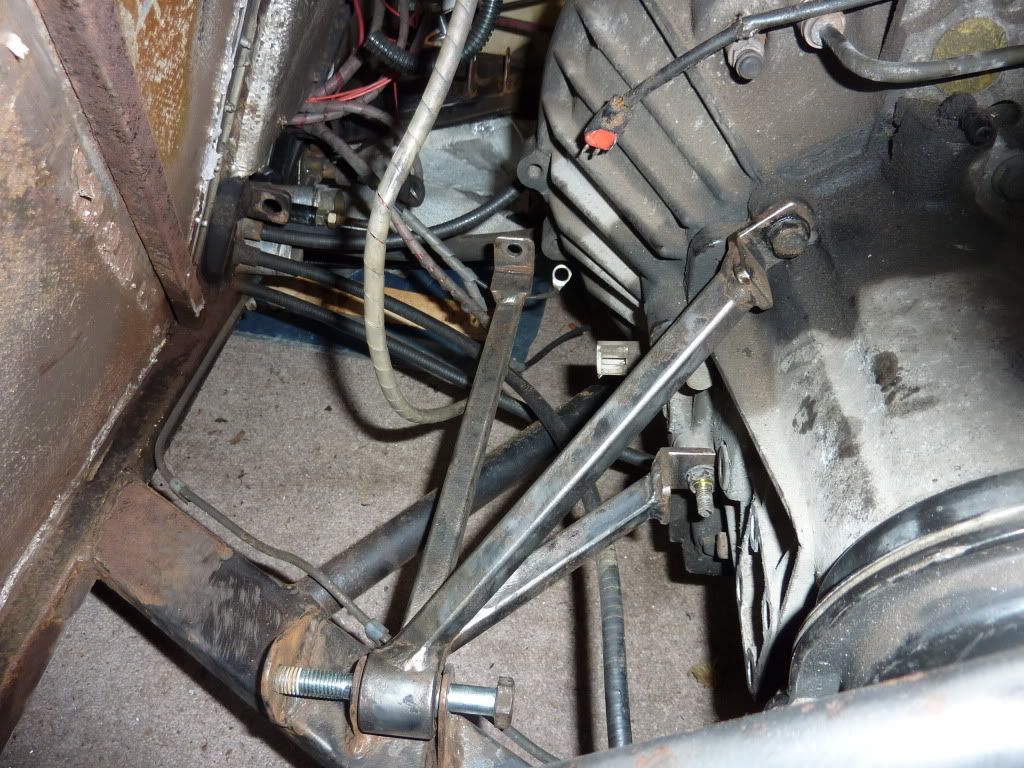
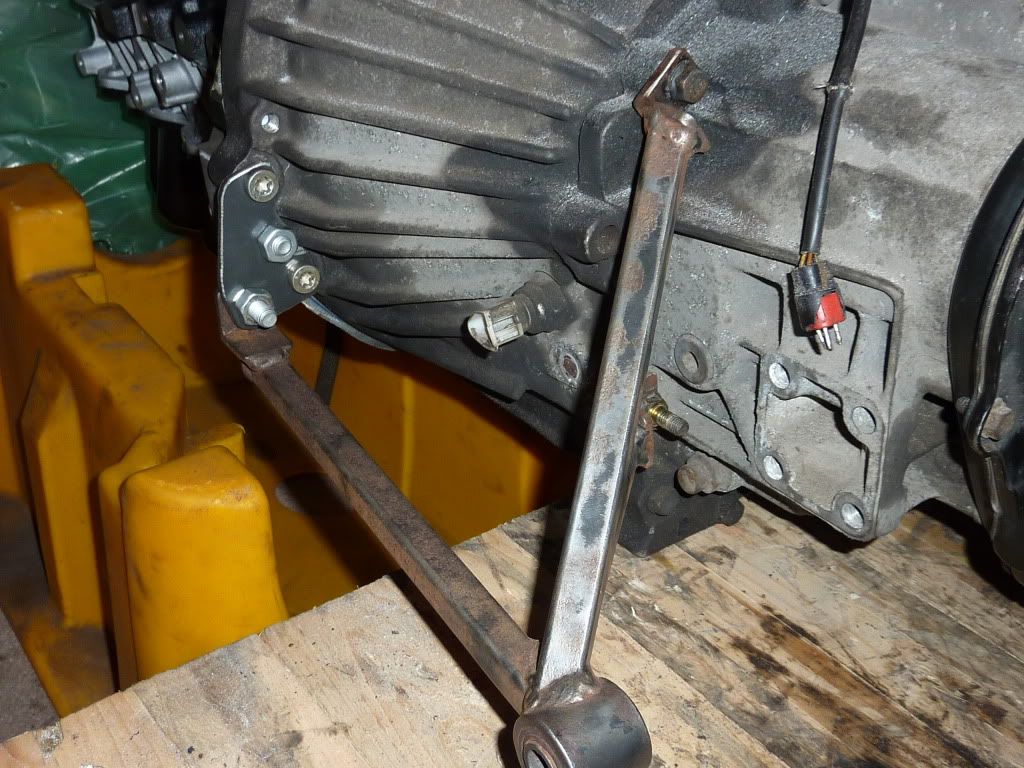
It’s difficult to describe the setup so will let the pictures do the
talking:
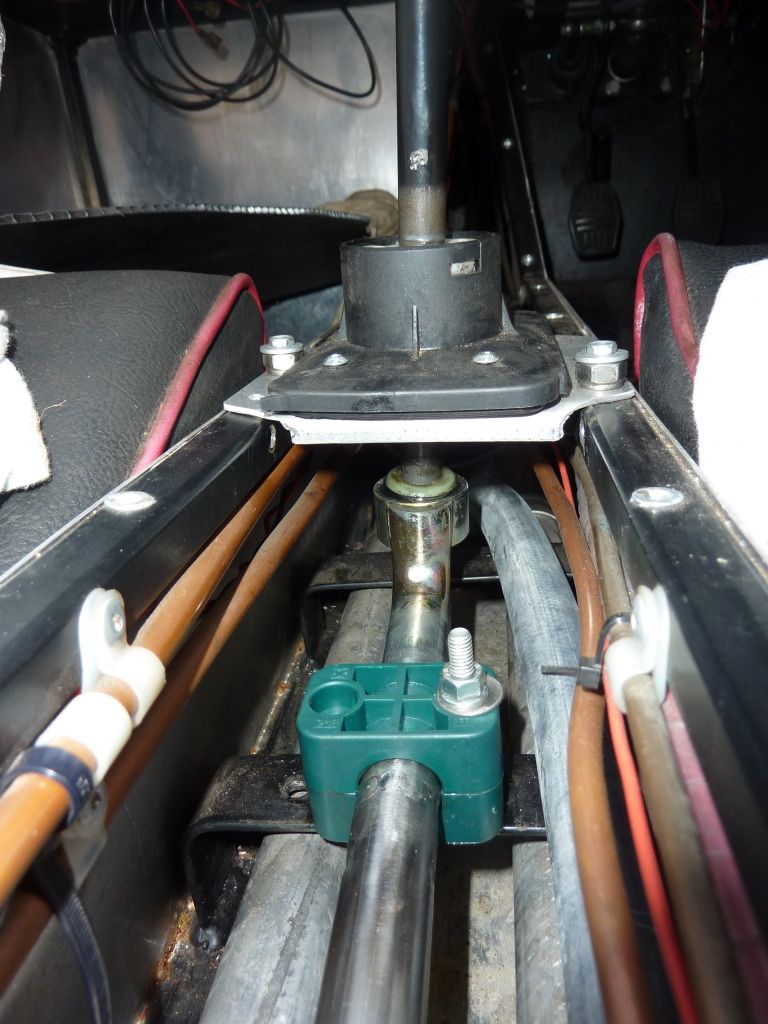

It uses the standard Fiesta lever, but the
activating rod sits upside down relative to the original install, with
the cup sitting higher than the rod, rather than below. This reverses
the direction of rotation of the rod for lateral movement of the lever,
but was required to maintain line of sight for the extended rod under
the sump. The rotation is then reversed back to standard at the rear,
and transposed across to the actuating lever on the gearbox by a rose
jointed arm
Sounds complicated... but the important thing is that it works... and has exactly the feel that I
was hoping for, that Riot style rifle bolt change that the old rod and
cable setup just didn’t have!
I’m not sure how the rear ‘bearing’ (which is just a hydraulic pipe
clamp) will hold up in this fairly exposed location, so will just have
to monitor it and consider shielding or sealing options further down the
line if required.
With the gear linkage sorted, it now felt like I was coasting towards
the finish line at last. Still lots of time consuming jobs, but no major
hurdles to overcome!
Amongst countless other jobs, the suspension mounts were all fully
torqued up and the alignment setup (all 4 corners of the car had been
dismantled so it needed a lot of tweaking!), and the rear section of the
body tub was re-fitted and the rear wings attached. My Mojo was now
starting to look like a Mojo!
The final few jobs involved things such as cutting a small hole in the
engine cover to clear the slightly larger cambelt cover on the later
engine (a bit of an annoyance, but not much I could do about it!),
fitting the wideband lambda sensor ready for re-mapping the ECU and
charging the battery fully!
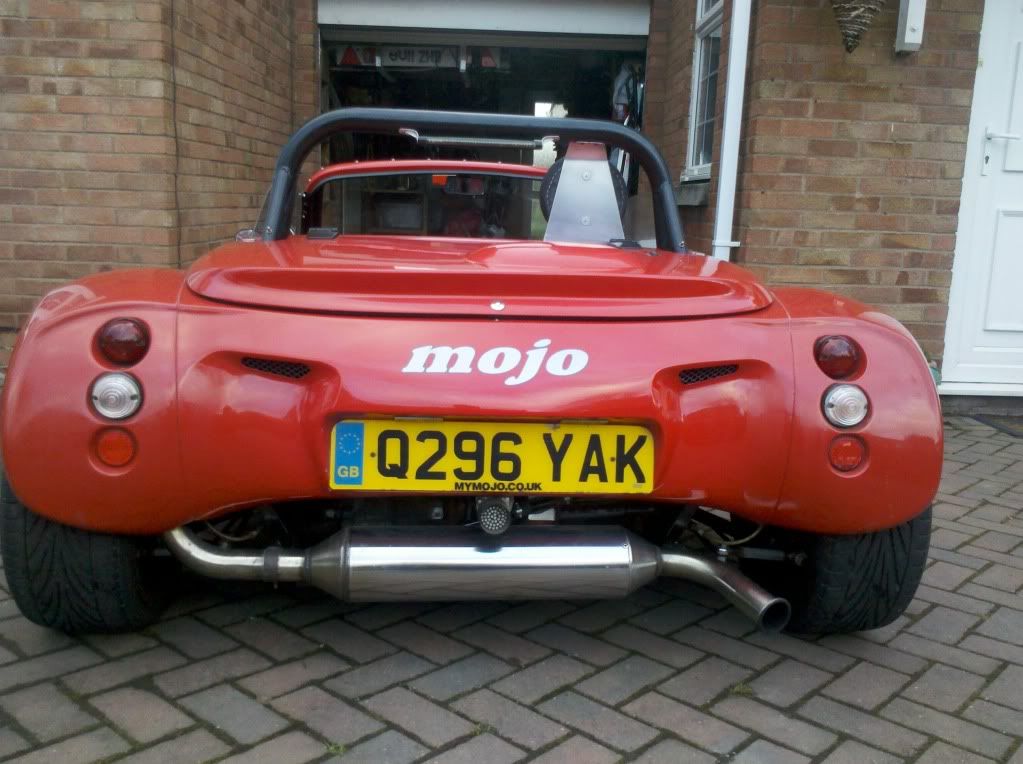
The car was
finished for the end of November, just in time
for some perfect kit car weather... so I took the decision to wait until
the end of January to get the MOT booked. With a trackday at Cadwell
Park booked for April, I couldn't afford to leave it much later, as the
engine would need a bit of mapping work prior to that.
The MOT was passed successfully, meaning
that normal service, i.e. the daily drive to work, was resumed!
I spent a few weeks tweaking the map, the
initial start point being an arbitrary 10% increase on the fuel map.
This was then significantly fine tuned using the wideband sensor during
on road driving, until I came up with what felt like a good setup. The
good news was that the engine was smoother, particularly at small
throttle openings, compared with the old engine. The GSXR750 thottle
bodies were probably a little large for the 1.8, which was always a bit
'fluffy' on slight throttle openings, but seem to suit the 2.0 much
better!
Performance is stronger in the mid range than
before, with plenty of torque on offer, although I am not sure that top
end power is significantly increased. It does make for a very easy going
setup.
Fuel consumption has increased slightly,
although this is slightly blurred by the fact that I recalibrated the
speedo to the new sensor, and tried to dial out the significant
over-read (I think about 6%) that was present before, calibrating the
new setup with GPS. I used to generally get somewhere in the region of
36mpg previously, and now get around 32mpg, however if you correct the
old figure for the odometer error, I think I am down by less than 2mpg
compared to previous, and of course the engine is also brand new so may
loosen a little in the future.
The gear linkage has proved to be a great
success, and has so far survived a year of use with no issues and no
noticeable wear to the joints. It is far more precise than the old
setup, and makes the car much more of a pleasure to drive.
Likewise the hydraulic clutch, which is so
smooth and light compared with the old setup, which suffered from a lot
of friction, and too much weight. I actually had to add an additional
spring to the clutch pedal to increase the pedal effort slightly, as it
was now too feather light!
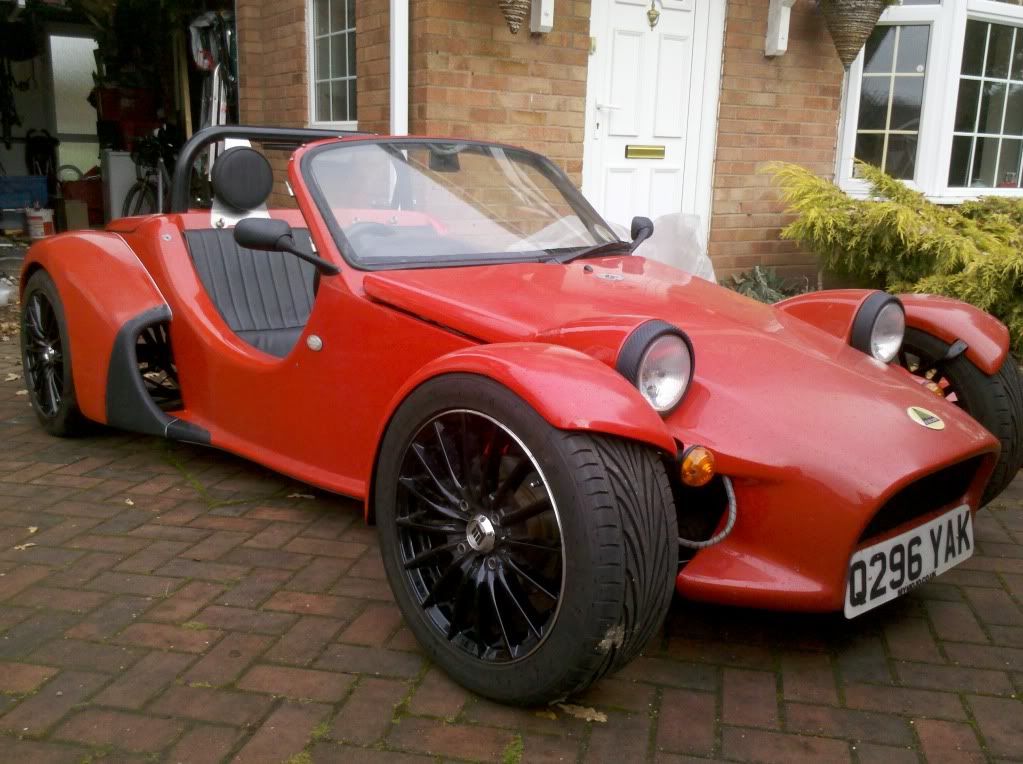
All round, I am well pleased with the
upgrades!
The full photo gallery is available via
Photobucket below:
|
|


